Chromebooks have taken over the classrooms in the US lately. The students might likely use an iPhone as their primary device alongside the Chromebook. As a result, ecosystems’ incompatibility becomes a barrier between the two since they’re the bi-products of two different companies, Google and Apple.
So, how about running iTunes on your Chromebook? Yes, it is possible to run iTunes on Chromebook, undoubtedly. This article will go through the entire process of installing iTunes on Chromebooks. Additionally, we’ll let you know how things perform to foresee things before installing it on your Chromebook.
Can You Install iTunes on Chromebook?
Yes, you can install iTunes on Chromebook, but there’s no solid proof that it works perfectly. Since it uses a third-party container, Wine via Linux, you may encounter issues then and now. iTunes is available on Windows as an alternative to Mac’s new Finder, which replaced iTunes after the release of macOS Catalina. The Windows version receives new updates, but the user interface feels outdated.
Installing iTunes on Chromebook (2022)
This guide will explain how to get iTunes working on your Chromebook. TL;DR, we’ll be using a Linux container to install the Windows version of iTunes on your Chromebook. For this purpose, we’ll use the Wine app to run the iTunes app. Ultimately, we’ll also guide you through creating a shortcut on your home screen.
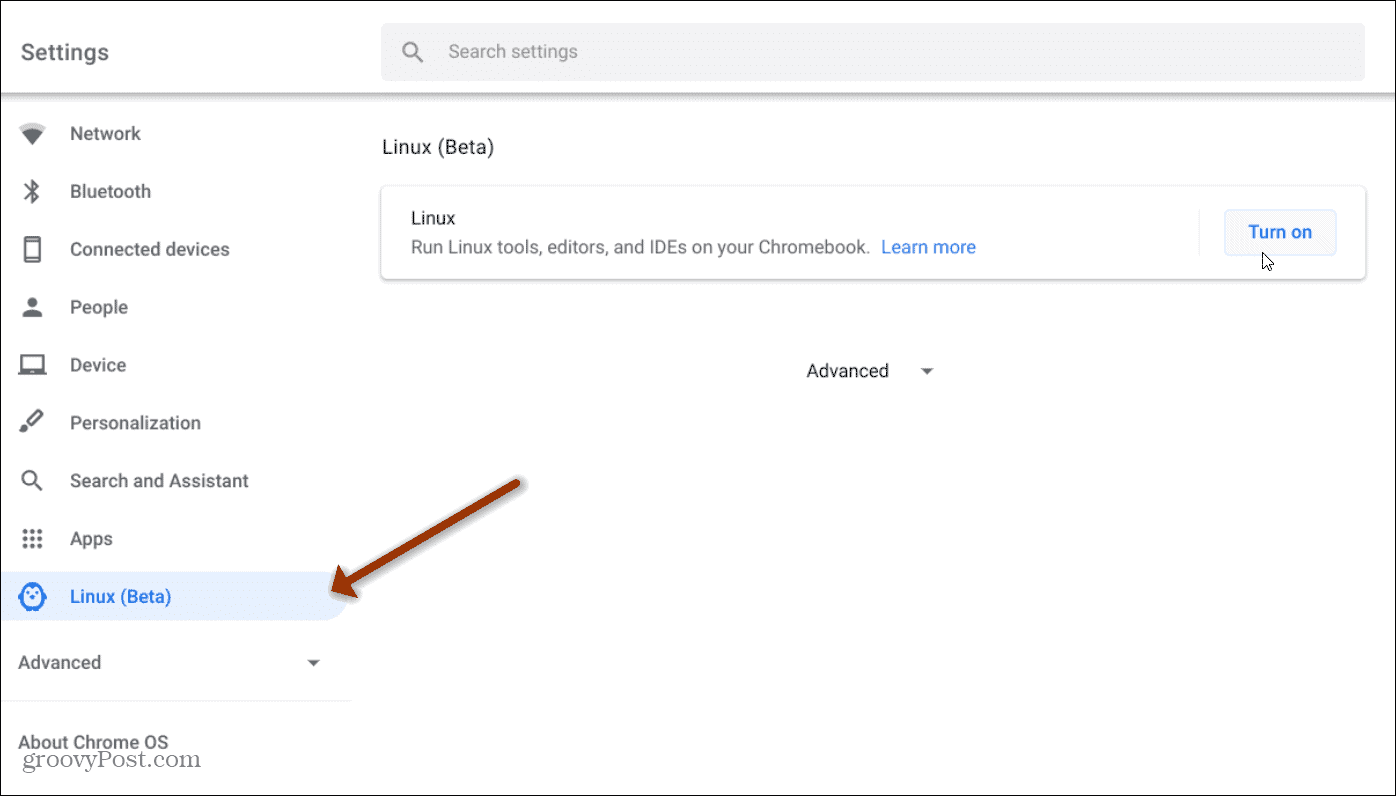
1. Before starting things, you need to enable Linux on your Chromebook. To achieve that, you need to head over to the Settings app on your Chromebook and search for the option that says “Linux (Beta),” and click the “Turn on” option next to it.
It will install Linux on your Chromebook, and a terminal window will open. Alternatively, you can look for a Terminal icon in the app drawer and open it.
2. After launching the Terminal window, you’ll need to execute some codes. Don’t worry about it; it is easy to do. Now you need to get updates for the system packages and their dependencies. To do so, type the following command in the Terminal.
sudo apt-get update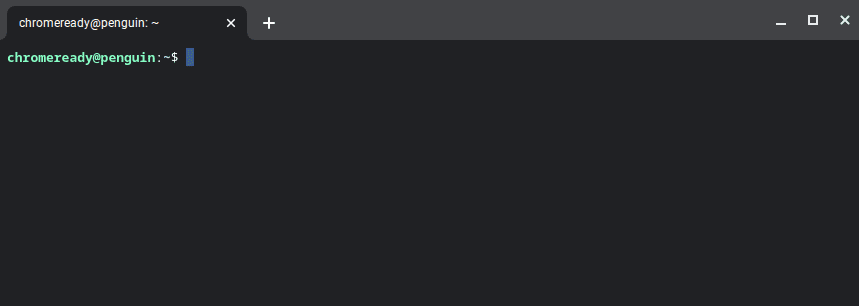
3. Once the text says “Done” after a few lines, you’ll need to install Wine. To accomplish that, you will need to execute this command.
sudo apt-get install wine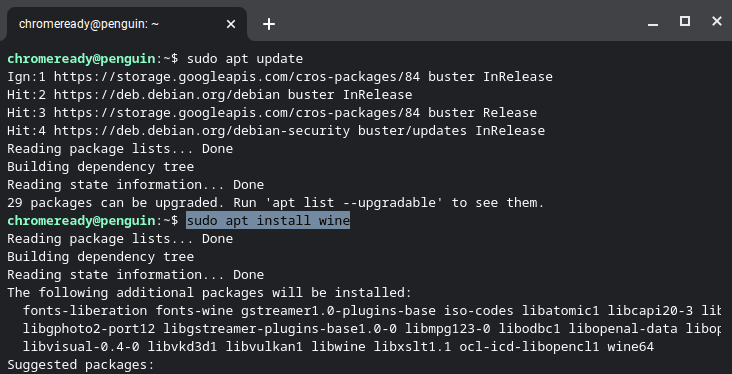
4. Once Wine gets installed on your Chromebook, you need to enable support for 32-bit applications. You need to execute the following commands, one by one, to do so.
sudo dpkg --add-architecture i386sudo apt updatesudo apt-get install wine32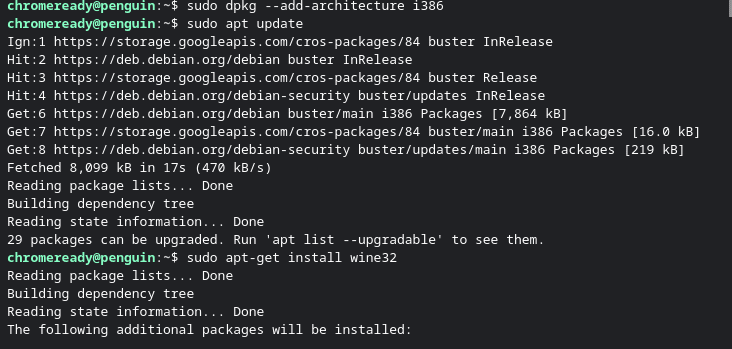
5. Wine should be set up by now entirely on your Chromebook. Now it’s time to download the iTunes for Windows (32-bit) setup. All you need to do is click the Download link below, and you’ll be ready.
Download iTunes for Windows Setup (32-bit)
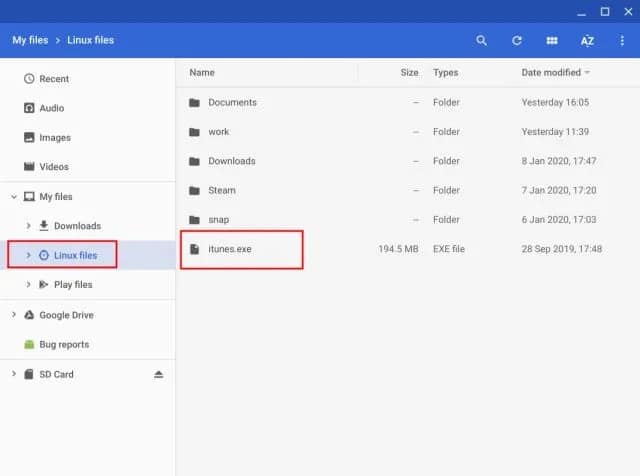
6. Once downloaded, it’s time to move the iTunes Setup to the Linux files directory, as shown below. Afterward, you shall rename the file to something easy like “iTunesSetup.exe” to remember.
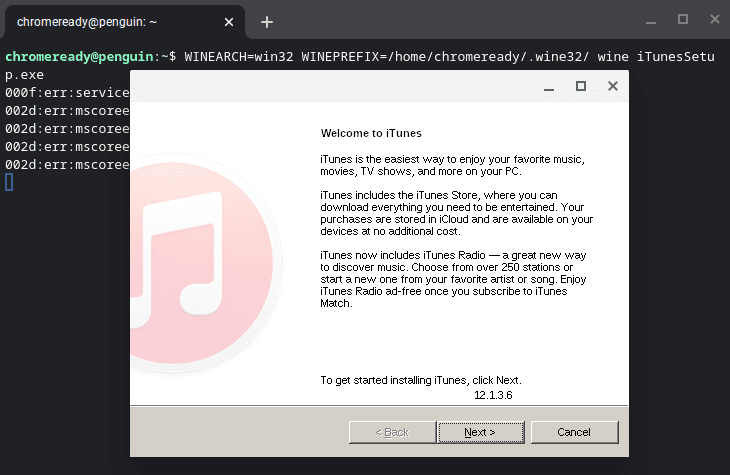
7. Once done with the above step, it’s time to install iTunes on your Chromebook. To install iTunes, you need to execute the following command, but replace “username” with the name of your Chromebook. You choose the username while enabling Linux (Beta) on the first step. Furthermore, replace “iTunesSetup.exe” with the name of your file.
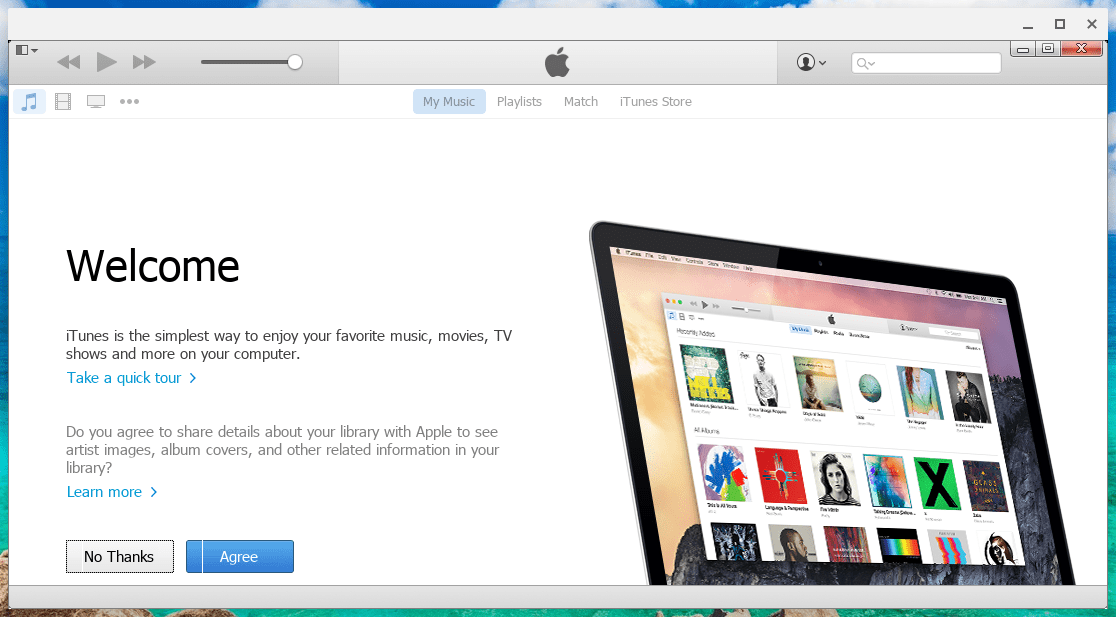
WINEARCH=win32 WINEPREFIX=/home/username/.wine32/ wine iTunesSetup.exe8. Once you press enter, an installation window will open up. Just click Next, and go through the setup. Once the installation finishes, you are good to go.
That’s it! You’ve successfully installed iTunes on your Chromebook. All you need to do is launch iTunes from the Application’s menu quickly.
Although, you might face an error that says, “Path Not Found.” If that’s the case, keep reading along.
Create Shortcut for iTunes on Chromebook
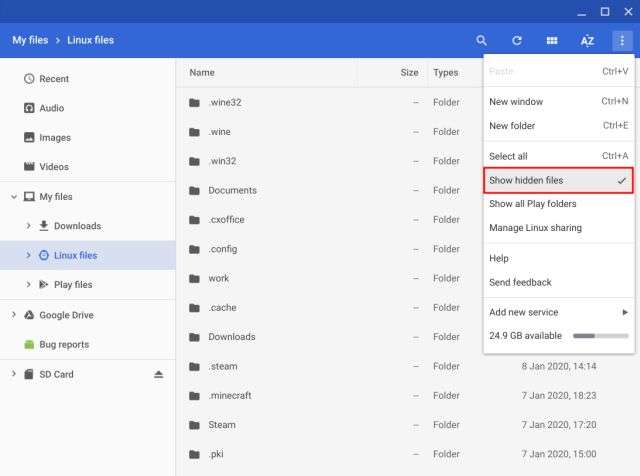
1. Open File Manager on your Chromebook and open the Linux file directory. On the top right, click on the three dots menu (⋮), and select “Show Hidden Files” from the menu.
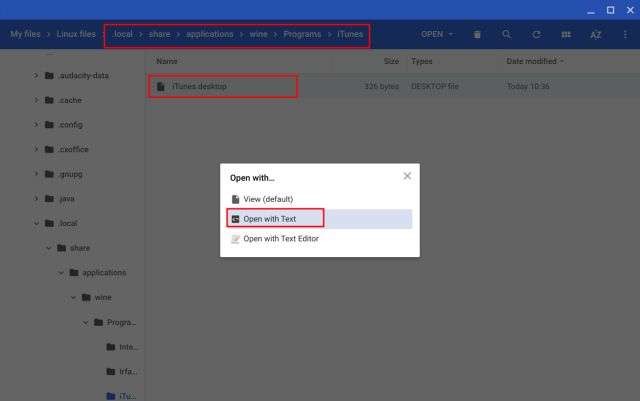
2. Navigate to the following path:
.local > share > applications > Wine > Program Files > iTunes
3. You’ll find an “iTunes.desktop” file. Right-click on it and select “Open with Text Editor.”
4. Once the Text Editor opens, you’ll find a line that starts with Exec=. You need to add the following code next to that. Make sure to replace “username” with the name of your Chromebook, as described in previous steps.
env WINEPREFIX="/home/your-user-name/.wine32" wine "/home/username/.wine32/drive_c/Program Files/iTunes/iTunes.exe"
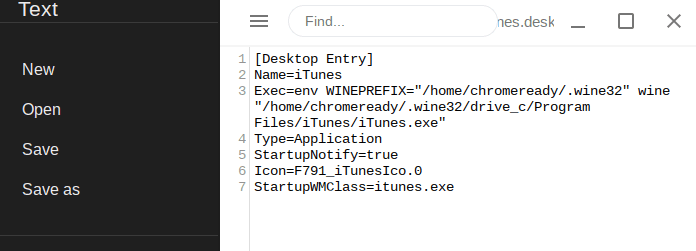
5. Save the file using Ctrl + S and close the text app.
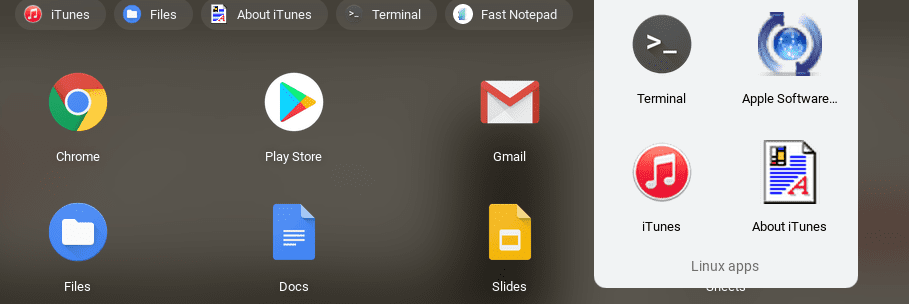
6. Finally, open iTunes from your App Drawer, which should open up flawlessly. Furthermore, you can pin the app to your Chrome Shelf to access it immediately.
How does iTunes on Chromebook Perform
We managed to install iTunes on the Chromebook as well. But the question is, how does iTunes run on a Chromebook? Our time spent with iTunes on Chromebook wasn’t pleasant in the first place. However, we saw it coming since we are running iTunes on a Windows container, which runs on a Linux container.
Whether you have a high or low-end Chromebook, the results are supposed to be the same. The performance wouldn’t be as good as expected, as a result. Linux on Chromebook gained the ability to detect USB recently. Notwithstanding, iTunes was unable to recognize the iPhone on our Chromebook. It may be because Apple doesn’t support Linux connectivity for Apple devices.
You might also face crashes while logging in to your Apple account on iTunes. So, no access to your media or library. In the end, the result is iTunes on Chromebook isn’t as good as it sounds. It’s better to seek some other options. We’ll post a dedicated article regarding iTunes alternatives for Chromebooks.
Enjoy iTunes on Chromebook.
That’s how you can install iTunes on a Chromebook. We know this process isn’t simple, but you can try it. Once you install Wine, you can access a wide range of Windows apps on a Chromebook. iTunes might not work as expected, but you should give it a chance, and things might run well for you.
If you face any trouble in the process, leave a comment below. We will try our best to address it. If we find a better iTunes build for Chromebook, we’ll update the guide for you. If you have further recommendations to improve this guide, you can also leave them in the comments.
YOU MIGHT ALSO LIKE THE FOLLOWING:
- How to Download Netflix on a PC or Laptop?
- Opera Mini Download For PC (Windows 11,10,8,7) 2024
- Fix: WhatsApp Web Couldn’t Link Device Try Again later
- 10 Best Windows 7 Themes to Download Free in 2024
- How to Enable and Disable Screen Distance on iPhone and iPad With iOS 17 Easily
- How to Cancel Subscriptions on iPhone, iPad, and Mac Easily
Hello Sajid,
Thanks for this.
There is nothing at the link to setup.exe.
Also, I am stuck at Step 7 with Exec format error.
Could you please help?
A sad user.
Hey Alfred,
I’ve updated the link. Also for Step 7, you need to replace the iTunesSetup.exe with the name of your file, you just downloaded.
Other than that, it may occur if you’re trying to run an executable compiled for an ARM architecture on an x86-64 architecture, which is much like asking your processor who only speaks English to take directions in Chinese.
i downloaded itunes step by step. however when i go to open itunes the icon just has a circle going around, like its loading. no window pops up ive restarted my laptop and tryed to only open itunes and still nothing.
As mentioned in the article, it is just a workaround method and can possess issues like these. Give it some time or try reinstalling it. That might help.
If the problem still persists, then there could be a possibility that the hardware isn’t compatible with it.