Google Chrome doesn’t require any special introduction, as it is well-known for its browsing capabilities. If you recently shifted to Google’s browser from any of your current browsers, you may find difficulty in importing and exporting passwords in Google Chrome.
The reason is Chrome doesn’t feature any direct option and supports import and export only through CSV files. Worry not, as we will show you how to import and export passwords in Google Chrome.
Why Should You Import Passwords in Google Chrome?
The uses for importing and exporting passwords on Google Chrome could be for two main reasons. If you switched from a different browser to Chrome recently, you might need to transfer all your saved passwords from your previous browser.
You might have accidentally cleared your saved passwords and want to import the backup still. In that case, if you have backed up a file that includes all your saved passwords. You can use the below methods to Import and Export Passwords in Google Chrome.
1. Import Passwords to Google Chrome Using Flags
Google Chrome has the ability to import passwords via the backup CSV file of the saved passwords but by default, the feature isn’t visible. To enable the feature, you need to check out Chome’s flag page and enable one of these experimental features.
You can easily enable the flag to import and export passwords on Google Chrome using the steps below:
1. Open Google Chrome on your computer.
2. Go to chrome://flags from the address bar of the browser.

3. Search for the Password import option.

4. Enable the Password import flag feature by changing it to Enabled from the dropdown menu.
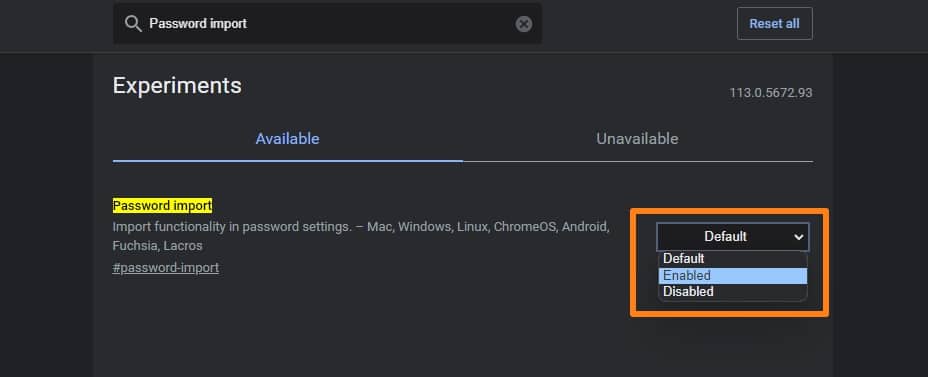
5. Click on the Relaunch option at the bottom.
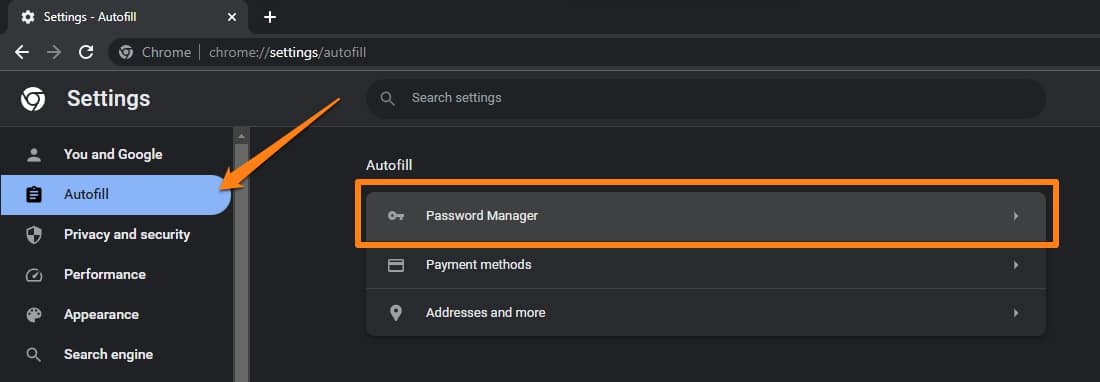
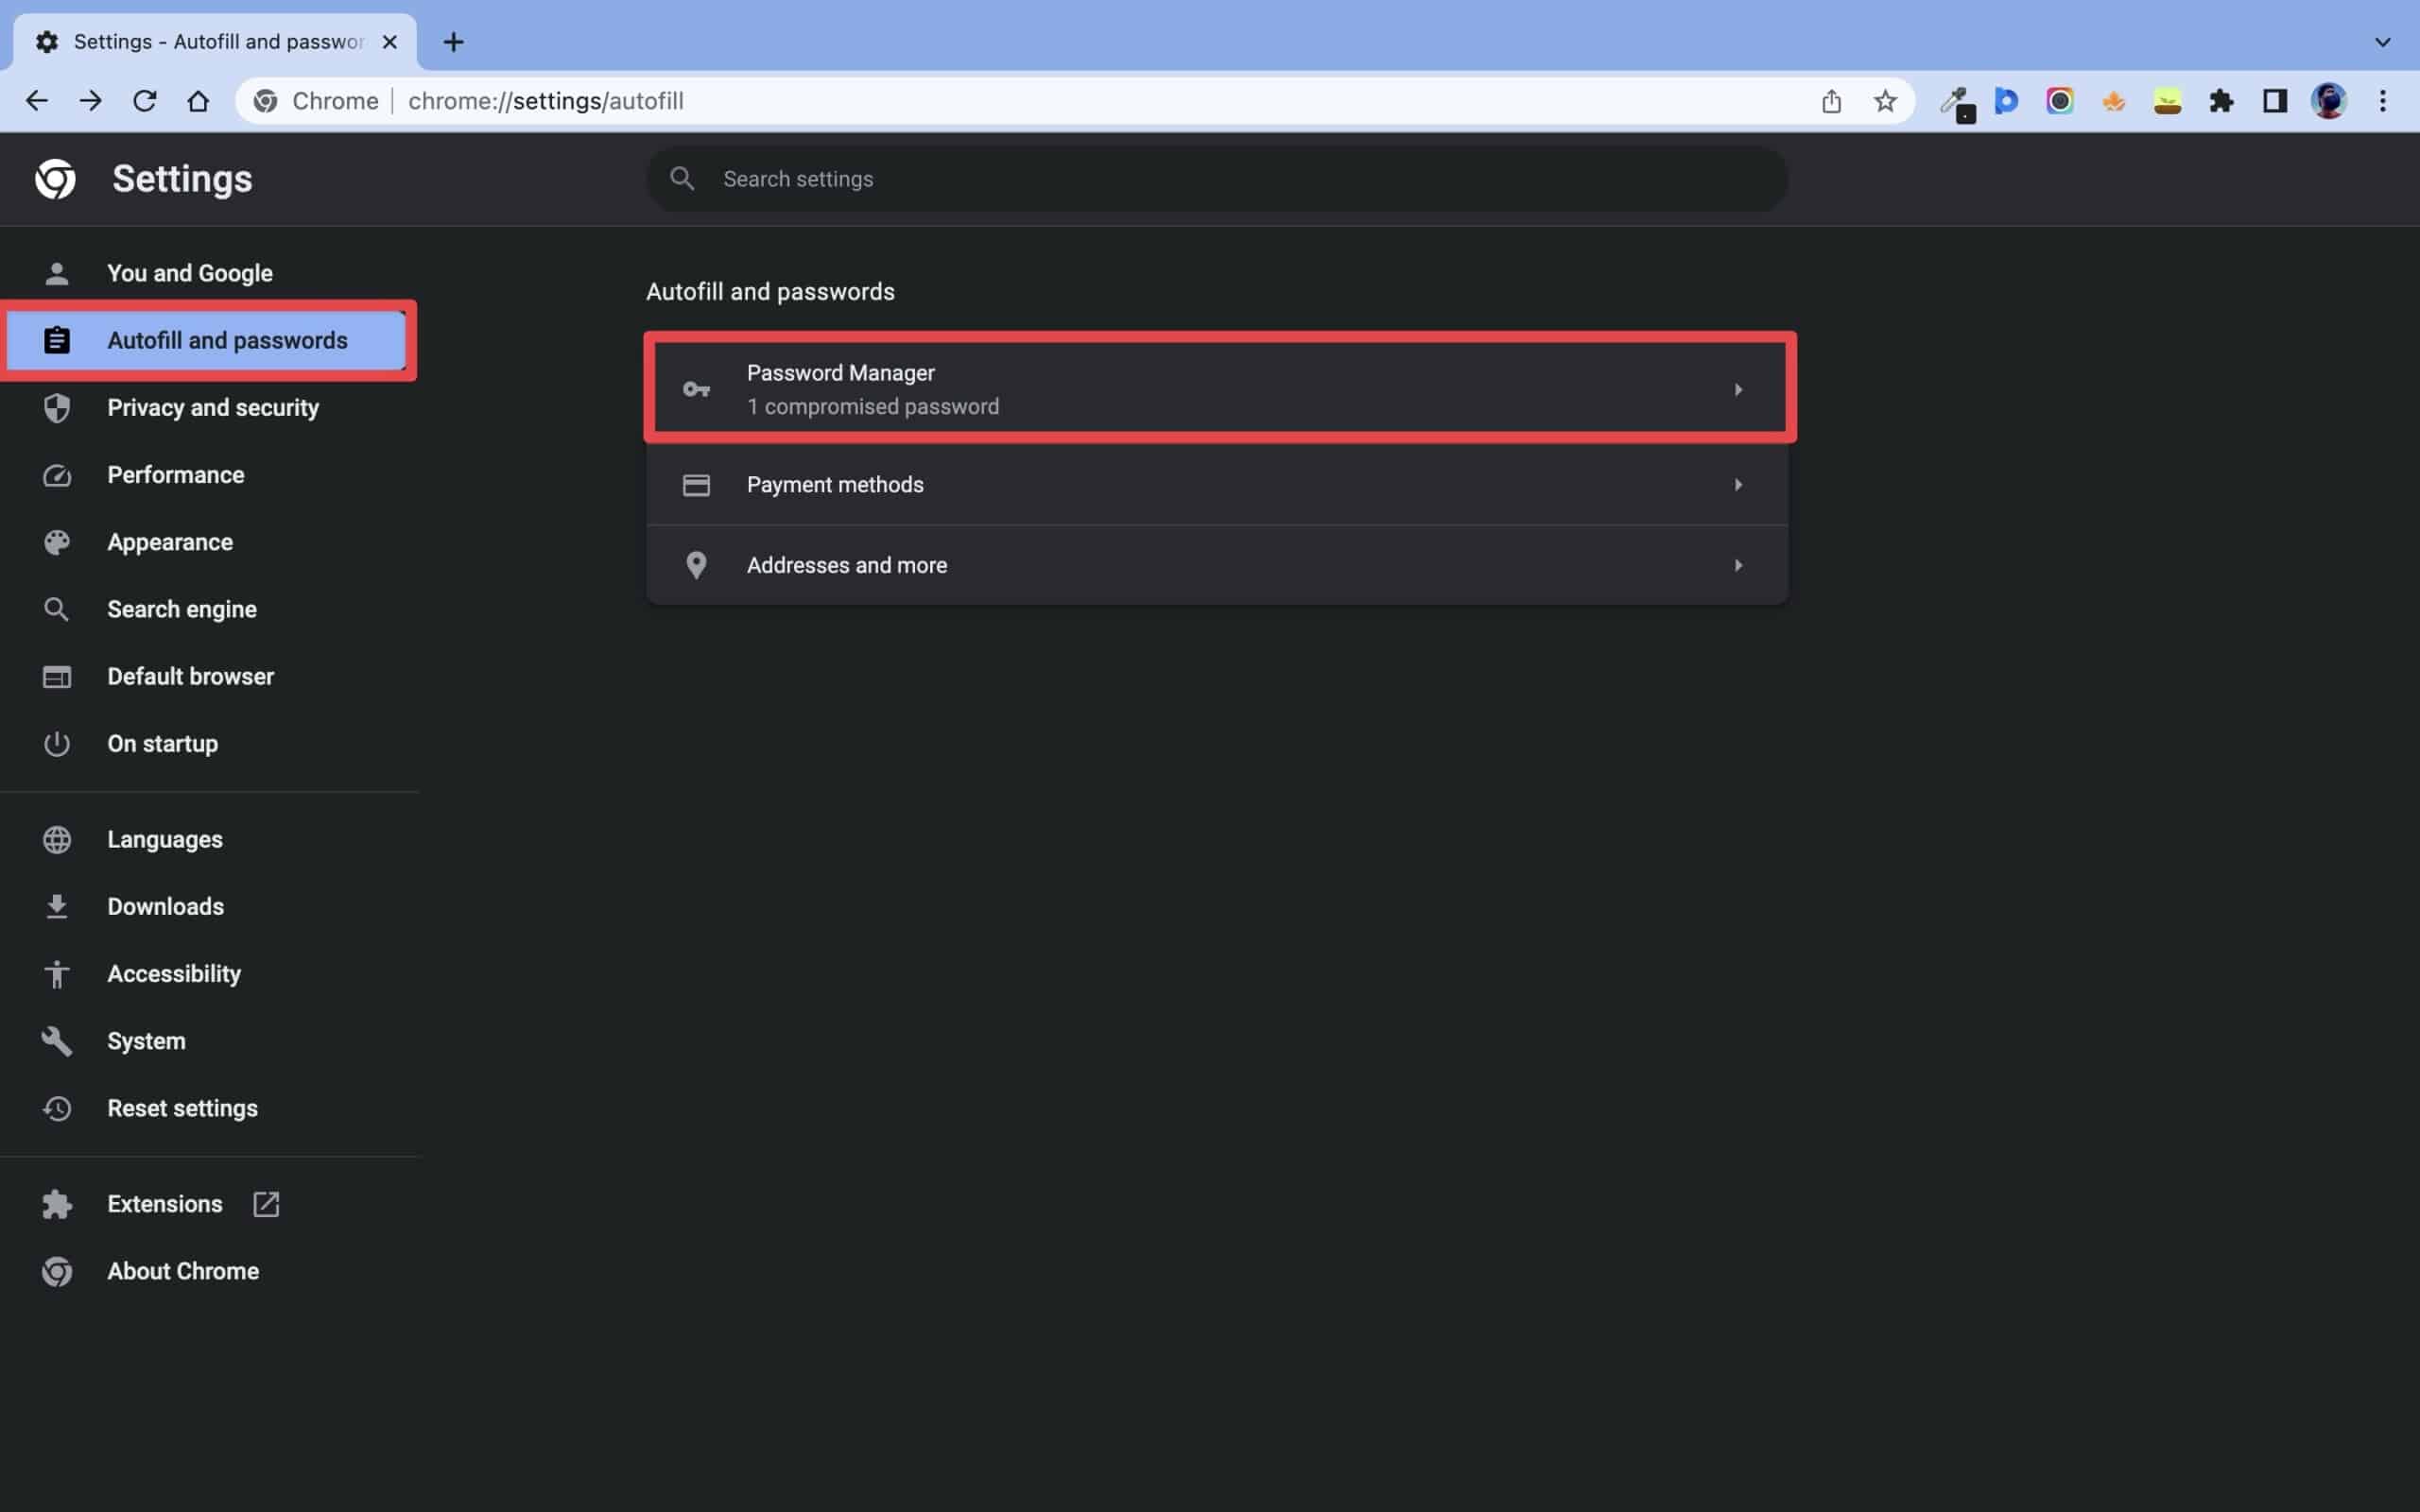
6. Select the three-dot menu option and then Settings
7. Click Autofill and then select Password Manager.
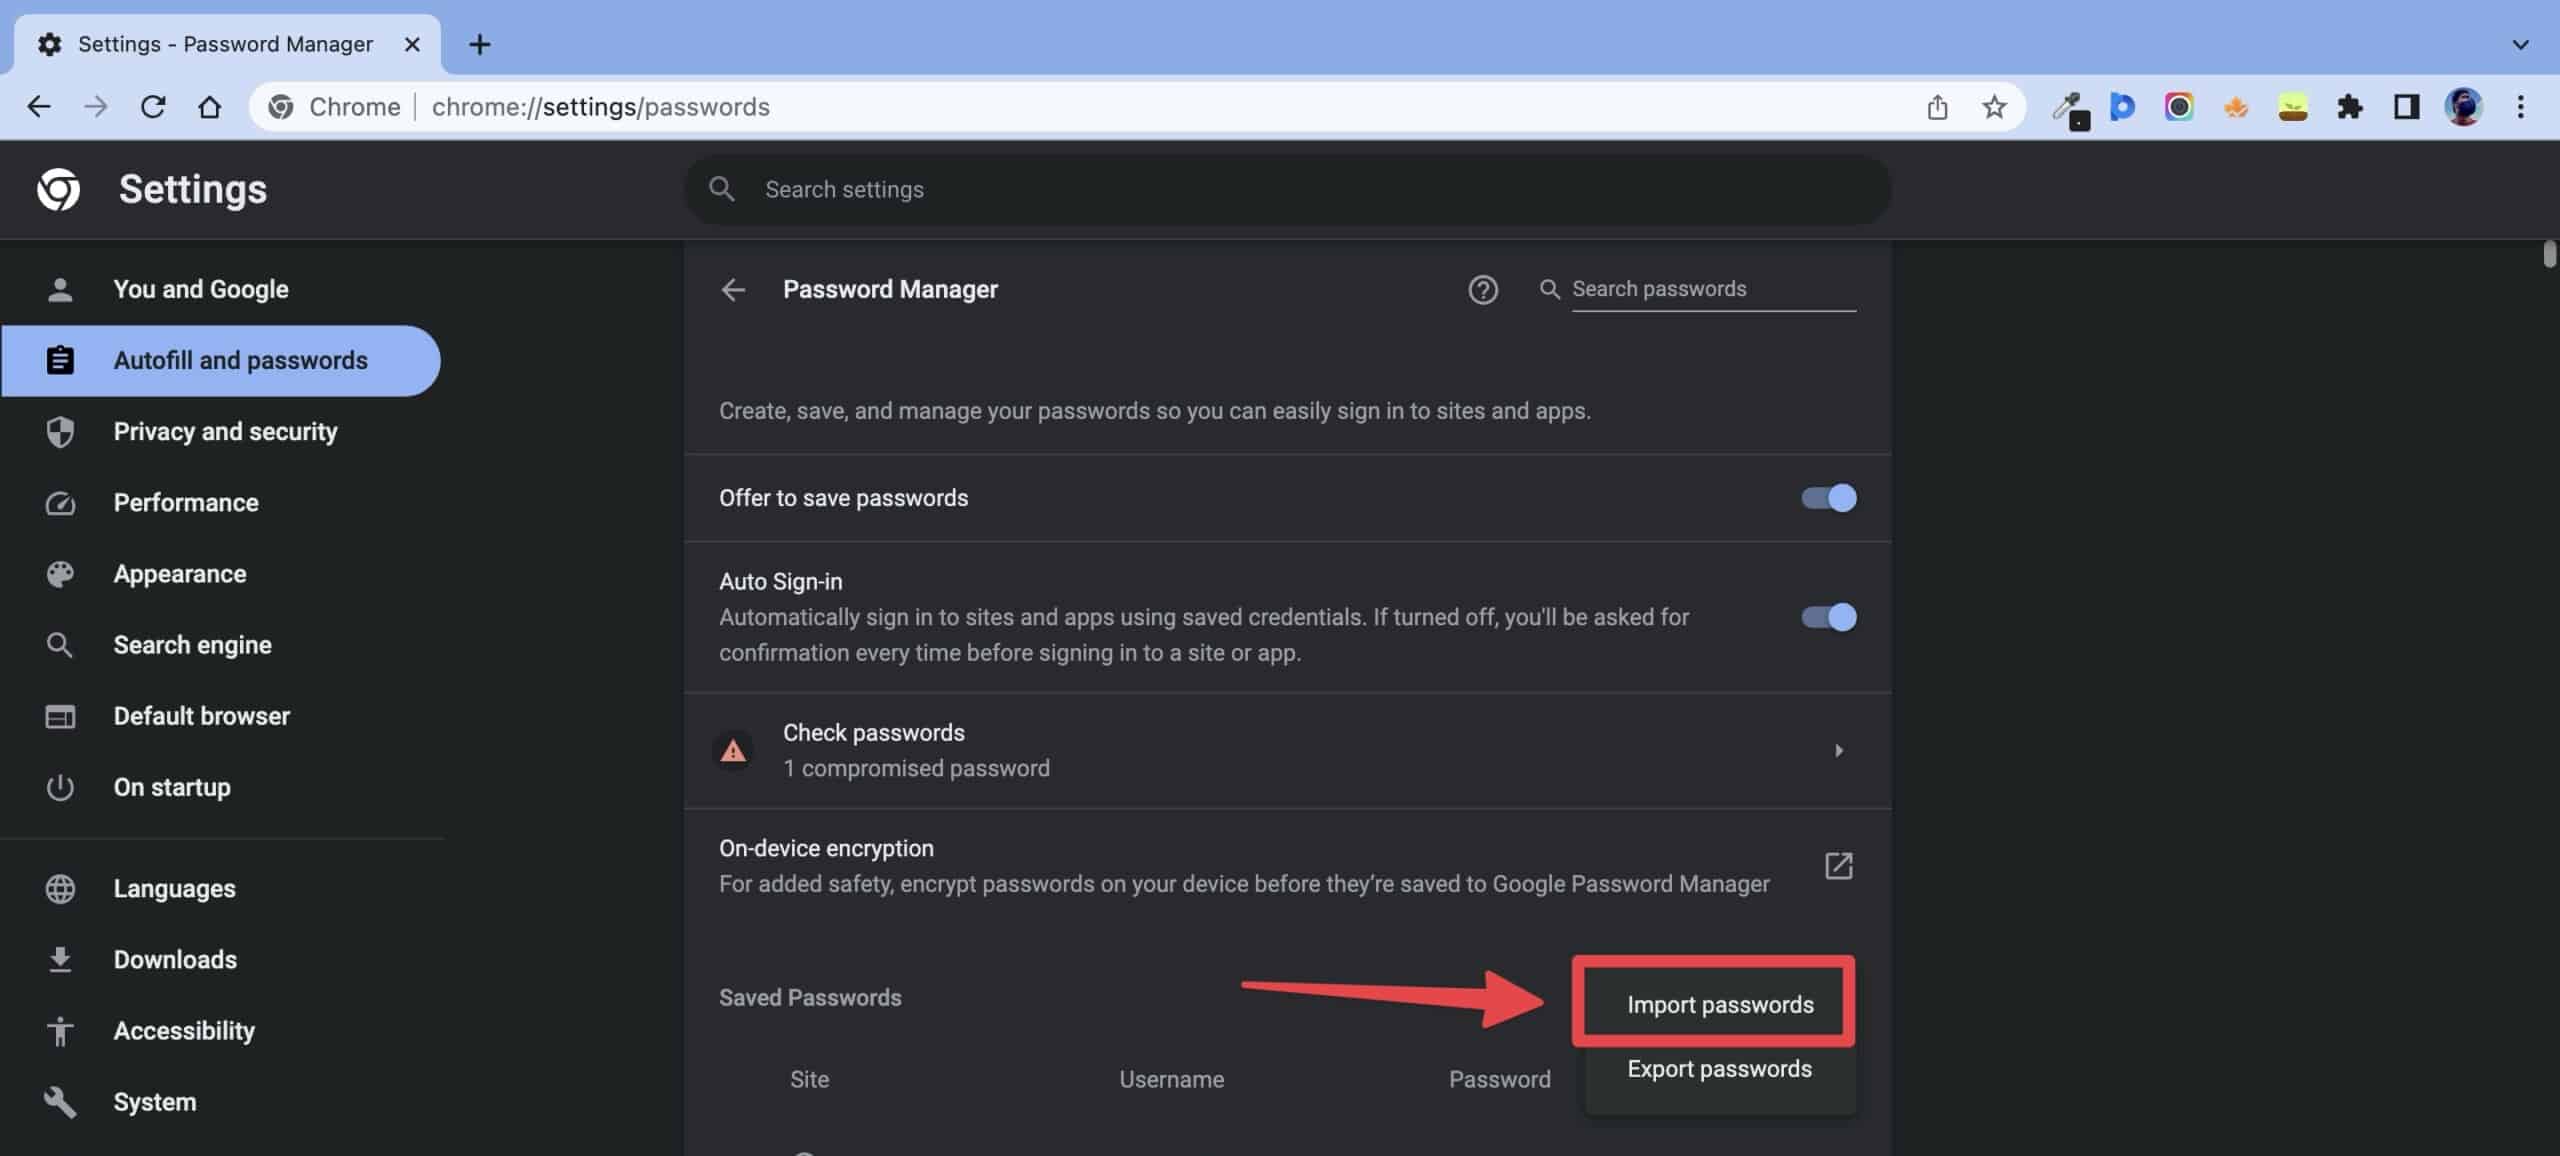
8. Click the three-dot menu next to Saved Passwords and select Import.
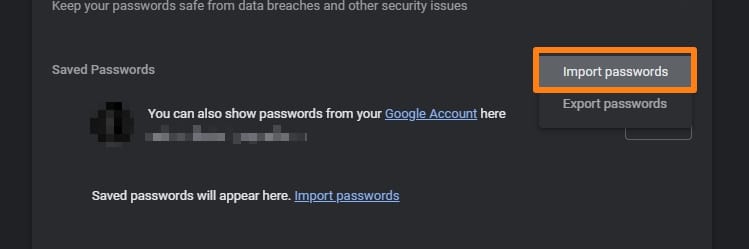
9. Select your CSV file and click Open.
2. Use a Command to Import Passwords to Google Chrome
You can import passwords on Google Chrome using a command on your computer. There’s a specific command that enables the import option on Google’s browser. The command works on both Windows and macOS systems.
There’s a slight difference in the process while importing passwords on both operating systems. Let’s take a look at the process to import passwords into Chrome using a command.
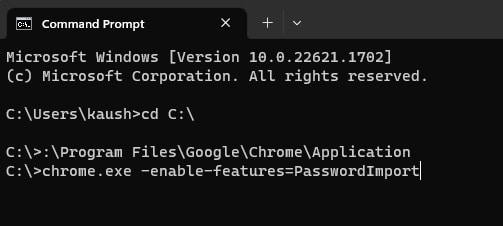
Import Passwords Into Chrome Using a Command on Windows
1. Open Start and search for the Command Prompt.

2. Type the “cd C:\” then “:\Program\Google\Chrome\Application” command and Press Enter.
3. Then, enter the “chrome.exe -enable-features=PasswordImport” command in the next step.
4. Open the Google Chrome browser on your desktop.
5. In Settings, Click on Autofill and then go to Password Manager.
6. Click the three-dots menu next to Saved Passwords and select Import.
Import Passwords on Google Chrome Using Terminal on macOS
It’s easy to find and manage saved passwords on a Mac. But Google doesn’t enable the import passwords option by default on macOS. Here’s how to enable and import passwords in Google Chrome using Terminal on macOS:
1. Open Spotlight using Cmd + Space on your Mac and search for Terminal.

2. In the Terminal window, enter the following command and press Enter to open Chrome./Applications/Google\ Chrome.app/Contents/MacOS/Google\ Chrome -enable-features=PasswordImport

4. In Settings, Click Autofill and passwords and then Password Manager.
5. Click the three-dot menu next to Saved Passwords and select Import.
3. Turn On Chrome’s Hidden Import Feature
Apart from Flags and Command Prompt, you can even enable the password import feature on Google Chrome. In this method, you need to alter the code of the Settings page temporarily to enable the option.
This requires you to change the value of an element in simple terms and the import option will appear on the Settings page.
1. Open Chrome and head over to the Settings page from the three-dot menu.
2. Go to the Passwords menu and then the Saved Passwords section.
3. Click on the three-dots option beside the Saved Passwords and then you can see the Export Passwords option.
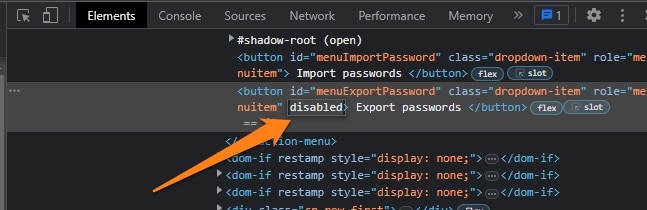
4. Right-click on the Export Passwords option and select Inspect for the source code page.

5. Look out for the element with ID menuImportPassword.
6. Remove the word disabled in the following code, and press Enter.
7. Go to Saved Passwords and the Import option will appear with which you can import passwords on Chrome.
4. Import Passwords on Google Chrome Using the Password Manager
Password Managers are a great tool for simple authentication and storing passwords. You can use the same for importing passwords from one browser to another by installing its extension on the browser.
We’ll use LastPass which is a well-known password manager for importing passwords and it requires the CSV file of your previously saved passwords.
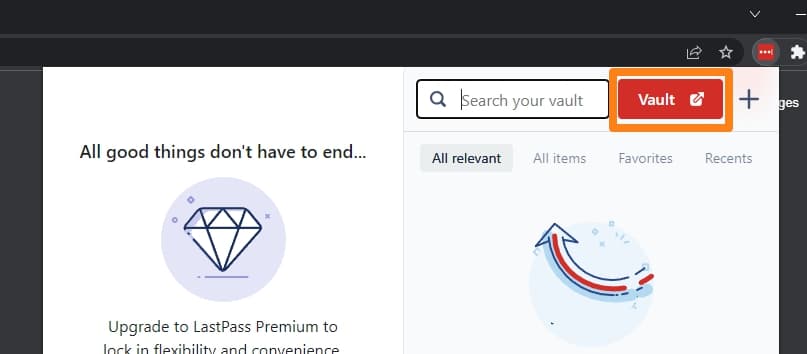
1. Open the Chrome browser and click on the LastPass extension.
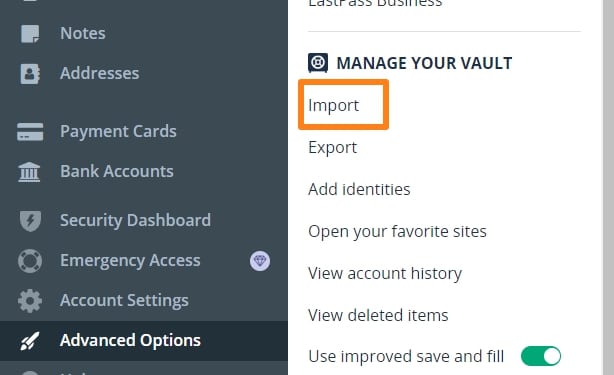
2. Click on the Vault option present on the top right of the menu.
3. In the left side pane of the menu, click on Advanced Options.
4. In the list menu, click on the Import option.
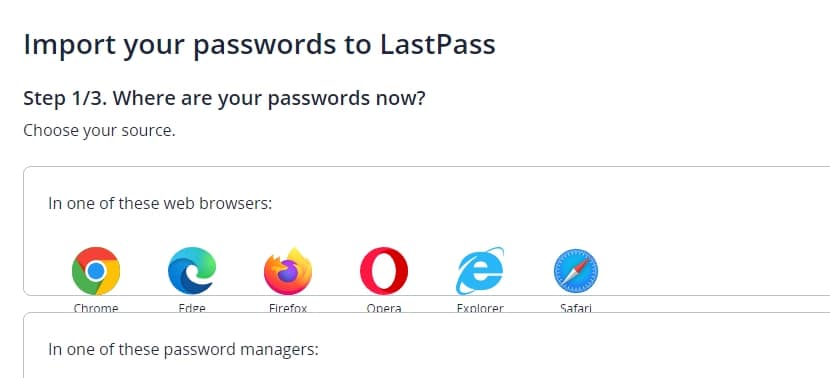
5. Now, choose the previous browser where the passwords are currently stored to import them to Chrome.
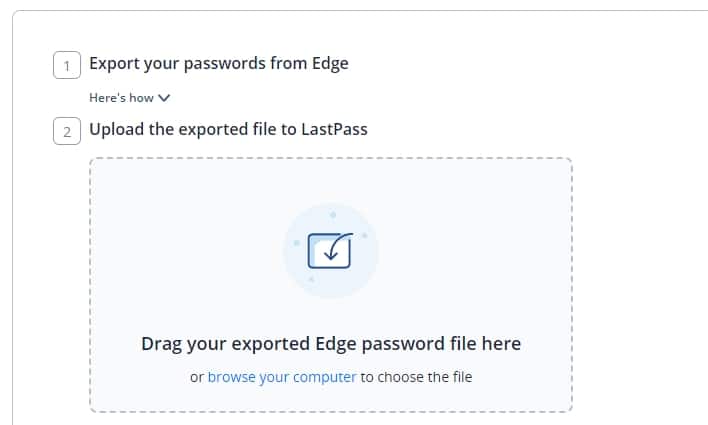
6. Select the downloaded CSV file using the upload box.
7. You can select the required passwords from the saved lot and unselect the rest of them.
8. Click on Import All to import the passwords on Google Chrome.
The next time when you require to Import passwords on Google Chrome or any browser. You can simply opt for the Password Manager which can store all the passwords. The password manager will directly autofill them when needed.
5. Import Passwords Directly Into Your Google Account
One of the easiest ways to import passwords on Chrome is to directly import them to your Google Account. For that, you need to have the account logged in and upload the CSV file into your account. Before, that you need to download the CSV file of the saved passwords from the previous browser.
Export the CSV file of the Saved Passwords from the Previous Browser
1. Open the browser which has your saved passwords.
2. Go to the Settings of the Browser and search for Password Manager.
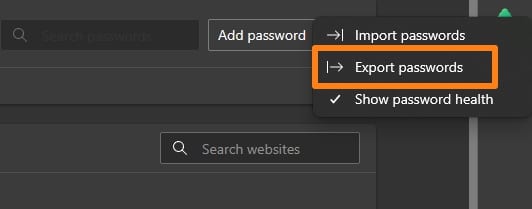
3. Now, click on the three-dot option and select Export in the Saved Passwords section.
4. Give a destination folder to save the CSV file and download it.
Import Passwords on Google Account using CSV file
1. Go to the Password Manager of your Google Account or type-in the following website in the address bar
passwords.google.com.
2. On the Password Manager page, click on the Gear icon in the top-right corner.
3. Select the Import option and enter your Google Account password.
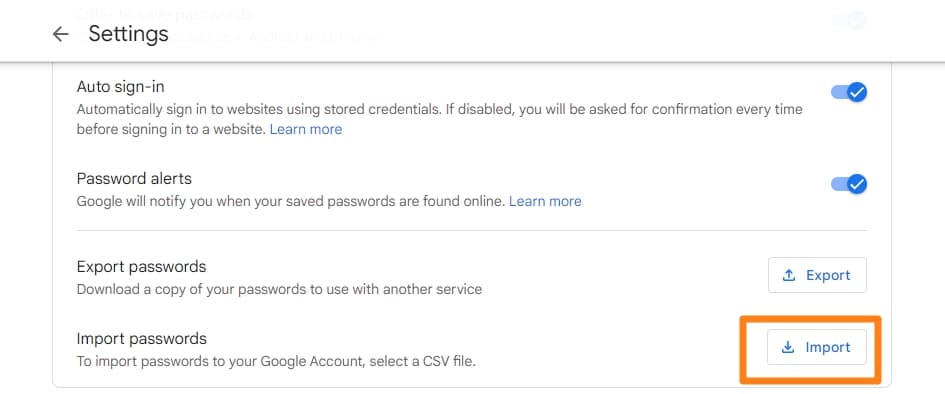
4. Open the CSV file that you have saved from the previous browser.
5. Click on Import once the CSV is uploaded and Click Done.
Import Passwords on Google Chrome Easily
These were a few of the methods to retrieve your saved passwords and transfer them easily to Google Chrome. Although, it’s a bit tricky for enabling the flag from the Chrome settings and transferring if you don’t want to middle with coding or commands.
The CSV file comes in handy in importing all of the saved passwords to Chrome from any browser. Hope we have helped you to import passwords from the previous browser to Google Chrome.