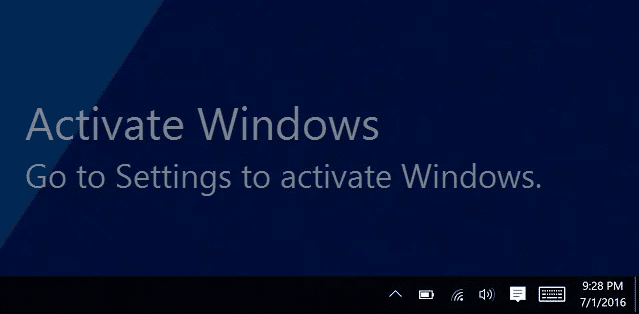
If you are using a non-activated version of Windows, there’s a high chance that you have seen the “Activate Windows 10 – Go to settings to activate Windows” watermark on your desktop. If you have got the product key from Microsoft Store or a retailer, you can use it to activate your WIndows 10 and that will remove the watermark.
If you don’t have the Product Key and it’s bothering you, you need not worry. Here are some tweaks which will help you hide or remove the Activate Windows watermark permanently.
Why do you get Activate Windows Watermark?
The reason why “Activate Windows” watermark appears is because your system doesn’t have an activated Windows installed. The other reason can be the expiration of your installed Windows product key. Having an activated Windows lets you access several features of Windows 10 like Windows Defender, Microsoft Office Installation, Security updates, personalization features, and more.
The best and easiest way to remove this watermark is to purchase a product key from any online retailer like Microsoft. Entering the product key will remove the Activate Windows watermark, and will let you access all the Windows 10 features.
If you don’t want to purchase any product key and want to get rid of the Activate Windows watermark, then here are few tweaks to remove Actiavte Windows watermark.
How To Remove Activate Windows Watermark Permanently
There are several ways to remove Activate Windows watermark. We will show you all the possible ways to remove Activate Windows watermark without using a product key.
1. Get rid of Activate Windows Watermark using Regedit
To remove the watermark using regedit, do the following:
1. Click Start and type in Regedit and hit Enter. Select “Yes” if prompted by UAC (User Account Control) box.
2. Now, navigate to HKEY_CURRENT_USER > Control Panel > Desktop.
3. Scroll down and find the PaintDesktopVersion and double click it to open.
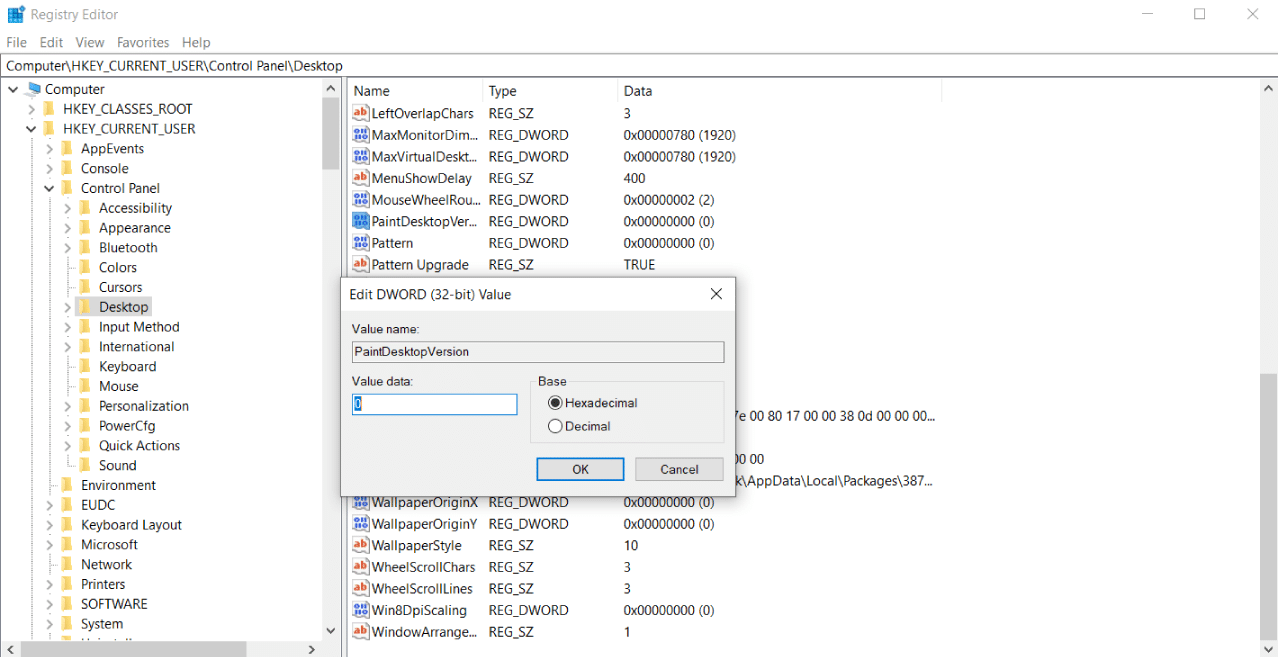
4. Once opened, make sure that the Hexadecimal option is selected. Then, change the Value data to 0 and click OK to save changes.
5. Now, close the Registry Editor and restart your Windows PC/Laptop.
When you log in to your desktop again, the Activate Windows watermark should be removed.
2. Disable Activate Windows Watermark via Windows PowerShell
Using this method will activate the Windows on temporary basis (90 days/3 months). You might need to use this command again after 90 days to continue removing the Activate Windows watermark. Here’s how you can remove the watermark using PowerShell:
1. Click Start and type in PowerShell. On the right pane, select “Run as Administrator” option. Choose “Yes” if prompted by UAC.
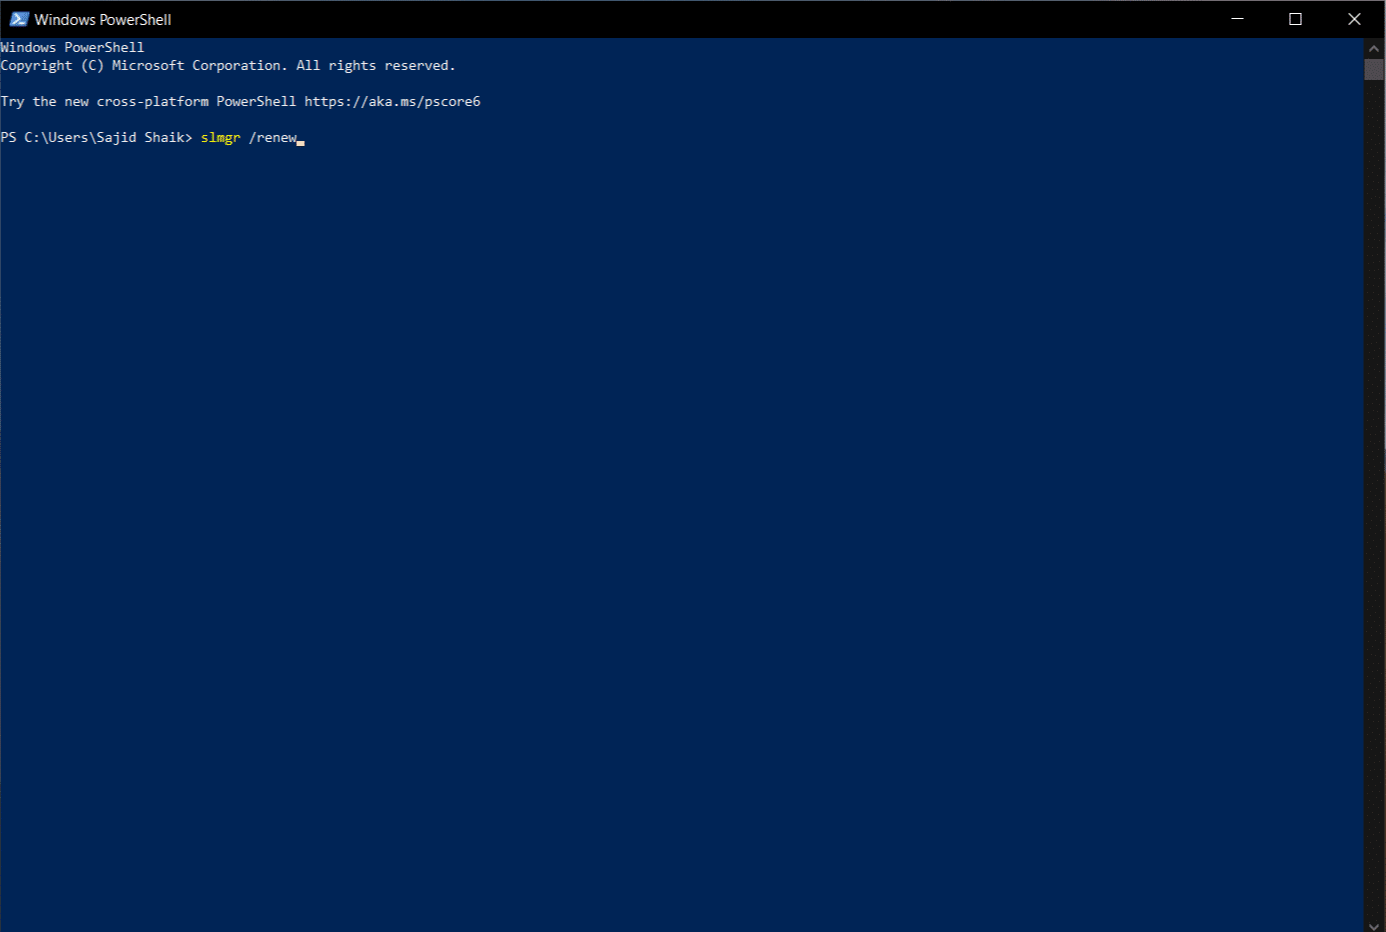
2. Once PowerShell opens, type this command and hit Enter.
slmgr /renew
3. Close PowerShell and restart your Windows PC/Laptop.
Once restarted, you will get rid of the Activate Windows watermark for the next 90 days. If you see the watermark again, run this command again and you will be good to go.
3. Disable Activate Windows Watermark using CMD (Command Prompt)
It is a rare case but activating Test mode can often cause the Activate Windows watermark to appear. If you disable the Test Mode, you can hide the Activate Windows watermark. To turn this off, follow these steps:
1. Click Start and type in CMD. On the right pane, click on the “Run as Administrator” option. Select “Yes” if prompted by UAC.
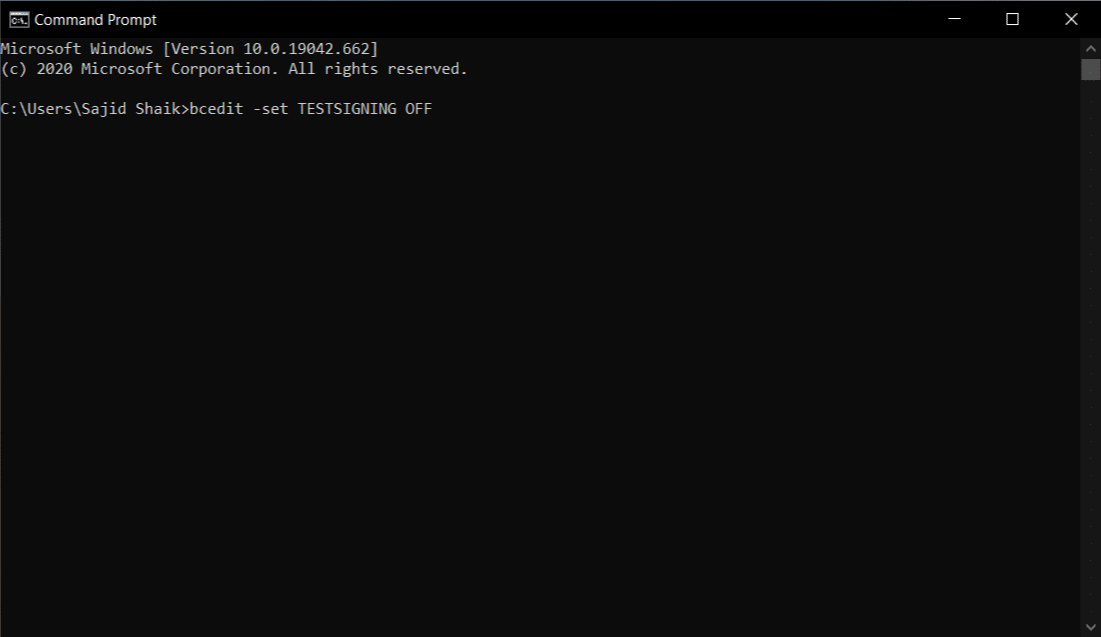
2. Once Command Prompt opens up, type this command and hit Enter.
bcdedit -set TESTSIGNING OFF
3. If everything goes good, you’ll see “Operation completed successfully” as a result. Restart your Windows PC/Laptop.
Once you restart your PC, you’ll see that you got rid of the Activate Windows watermark.
4. Remove Activate Windows Watermark with a Script
Although there are many ways to remove the Activate Windows watermark, one of those methods is using a script. Running this script might get rid of the Activate Windows watermark.
1. Click Start > search for Notepad and hit Enter.
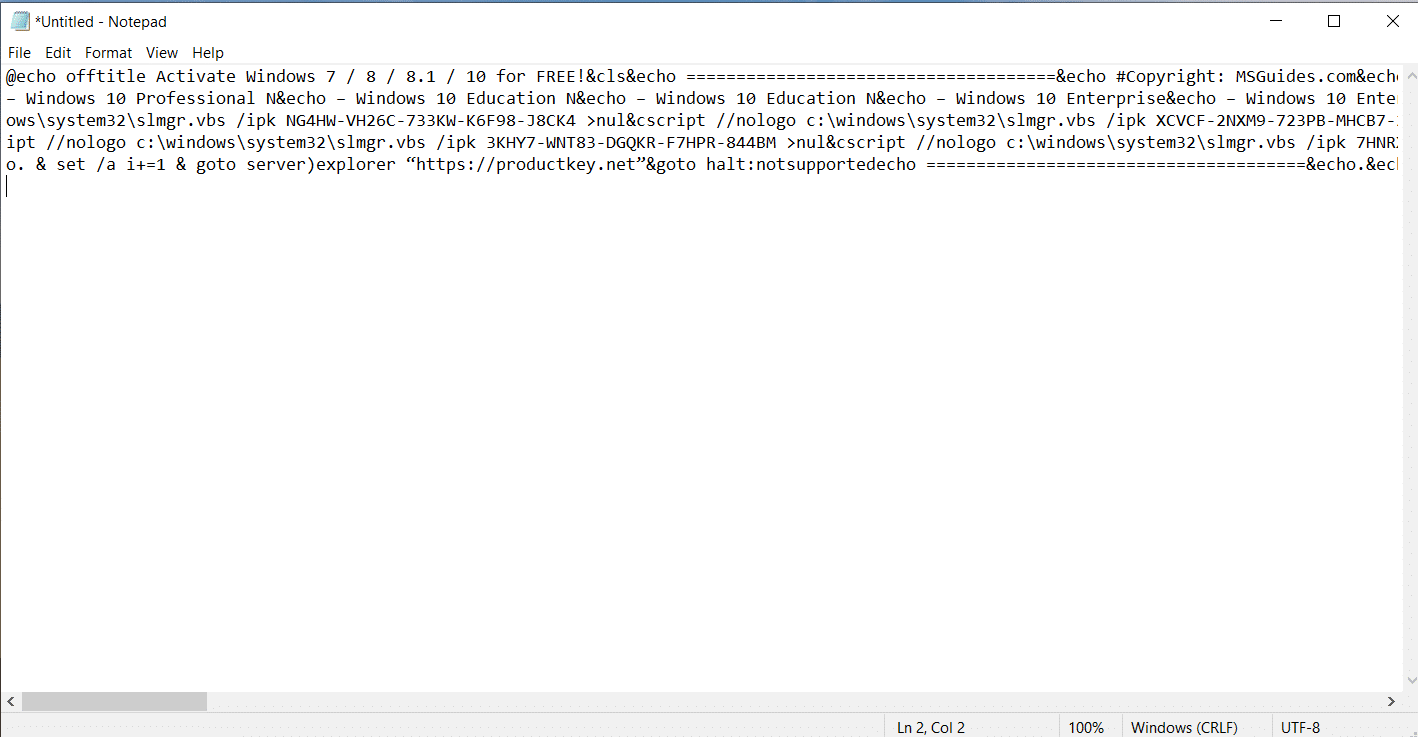
2. Once opened, copy and paste the below text to the Notepad.
@echo offtitle Activate Windows 7 / 8 / 8.1 / 10 for FREE!&cls&echo =====================================&echo #Copyright: MSGuides.com&echo =====================================&echo.&echo #Supported products:&echo – Windows 7 Professional&echo – Windows 7 Professional N&echo – Windows 7 Professional E&echo – Windows 7 Enterprise&echo – Windows 7 Enterprise N&echo – Windows 7 Enterprise E&echo – Windows 8 Core&echo – Windows 8 Core Single Language&echo – Windows 8 Professional&echo – Windows 8 Professional N&echo – Windows 8 Professional WMC&echo – Windows 8 Enterprise&echo – Windows 8 Enterprise N&echo – Windows 8.1 Core&echo – Windows 8.1 Core N&echo – Windows 8.1 Core Single Language&echo – Windows 8.1 Professional&echo – Windows 8.1 Professional N&echo – Windows 8.1 Professional WMC&echo – Windows 8.1 Enterprise&echo – Windows 8.1 Enterprise N&echo – Windows 10 Home&echo – Windows 10 Home N&echo – Windows 10 Home Single Language&echo – Windows 10 Home Country Specific&echo – Windows 10 Professional&echo – Windows 10 Professional N&echo – Windows 10 Education N&echo – Windows 10 Education N&echo – Windows 10 Enterprise&echo – Windows 10 Enterprise N&echo – Windows 10 Enterprise LTSB&echo – Windows 10 Enterprise LTSB N&echo.&echo.&echo ====================================&echo Activating your Windows… & cscript //nologo c:\windows\system32\slmgr.vbs /ipk FJ82H-XT6CR-J8D7P-XQJJ2-GPDD4 >nul&cscript //nologo c:\windows\system32\slmgr.vbs /ipk MRPKT-YTG23-K7D7T-X2JMM-QY7MG >nul&cscript //nologo c:\windows\system32\slmgr.vbs /ipk W82YF-2Q76Y-63HXB-FGJG9-GF7QX >nul&cscript //nologo c:\windows\system32\slmgr.vbs /ipk 33PXH-7Y6KF-2VJC9-XBBR8-HVTHH >nul&cscript //nologo c:\windows\system32\slmgr.vbs /ipk YDRBP-3D83W-TY26F-D46B2-XCKRJ >nul&cscript //nologo c:\windows\system32\slmgr.vbs /ipk C29WB-22CC8-VJ326-GHFJW-H9DH4 >nul&cscript //nologo c:\windows\system32\slmgr.vbs /ipk BN3D2-R7TKB-3YPBD-8DRP2-27GG4 >nul&cscript //nologo c:\windows\system32\slmgr.vbs /ipk 2WN2H-YGCQR-KFX6K-CD6TF-84YXQ >nul&cscript //nologo c:\windows\system32\slmgr.vbs /ipk NG4HW-VH26C-733KW-K6F98-J8CK4 >nul&cscript //nologo c:\windows\system32\slmgr.vbs /ipk XCVCF-2NXM9-723PB-MHCB7-2RYQQ >nul&cscript //nologo c:\windows\system32\slmgr.vbs /ipk GNBB8-YVD74-QJHX6-27H4K-8QHDG >nul&cscript //nologo c:\windows\system32\slmgr.vbs /ipk 32JNW-9KQ84-P47T8-D8GGY-CWCK7 >nul&cscript //nologo c:\windows\system32\slmgr.vbs /ipk JMNMF-RHW7P-DMY6X-RF3DR-X2BQT >nul&cscript //nologo c:\windows\system32\slmgr.vbs /ipk M9Q9P-WNJJT-6PXPY-DWX8H-6XWKK >nul&cscript //nologo c:\windows\system32\slmgr.vbs /ipk 7B9N3-D94CG-YTVHR-QBPX3-RJP64 >nul&cscript //nologo c:\windows\system32\slmgr.vbs /ipk BB6NG-PQ82V-VRDPW-8XVD2-V8P66 >nul&cscript //nologo c:\windows\system32\slmgr.vbs /ipk GCRJD-8NW9H-F2CDX-CCM8D-9D6T9 >nul&cscript //nologo c:\windows\system32\slmgr.vbs /ipk HMCNV-VVBFX-7HMBH-CTY9B-B4FXY >nul&cscript //nologo c:\windows\system32\slmgr.vbs /ipk 789NJ-TQK6T-6XTH8-J39CJ-J8D3P >nul&cscript //nologo c:\windows\system32\slmgr.vbs /ipk TX9XD-98N7V-6WMQ6-BX7FG-H8Q99 >nul&cscript //nologo c:\windows\system32\slmgr.vbs /ipk 3KHY7-WNT83-DGQKR-F7HPR-844BM >nul&cscript //nologo c:\windows\system32\slmgr.vbs /ipk 7HNRX-D7KGG-3K4RQ-4WPJ4-YTDFH >nul&cscript //nologo c:\windows\system32\slmgr.vbs /ipk PVMJN-6DFY6-9CCP6-7BKTT-D3WVR >nul&cscript //nologo c:\windows\system32\slmgr.vbs /ipk W269N-WFGWX-YVC9B-4J6C9-T83GX >nul&cscript //nologo c:\windows\system32\slmgr.vbs /ipk MH37W-N47XK-V7XM9-C7227-GCQG9 >nulecho ————————————&echo.&echo.&set i=1:serverif %i%==1 set KMS_Sev=kms7.MSGuides.comif %i%==2 set KMS_Sev=kms8.MSGuides.comif %i%==3 set KMS_Sev=kms9.MSGuides.comif %i%==4 goto notsupportedcscript //nologo c:\windows\system32\slmgr.vbs /skms %KMS_Sev% >nulcscript //nologo c:\windows\system32\slmgr.vbs /ato | find /i “successfully” && (echo.& echo ====================================== & echo. & choice /n /c YN /m “Would you like to visit my blog [Y,N]?” & if errorlevel 2 exit) || (echo The connection to the server failed! Trying to connect to another one… & echo Please wait… & echo. & echo. & set /a i+=1 & goto server)explorer “https://productkey.net”&goto halt:notsupportedecho ======================================&echo.&echo Sorry! Your version is not supported.:haltpause >nul
3. After pasting this text, go to File > Save As and give the file name as windows.cmd only. Choose “All files” from the Save as type dropdown menu.
4. Save the file on Desktop for easier access, and click Save.
5. Now close the notepad, and go to the Desktop. Right-click on the “windows.cmd” file and select “Run as administrator.” Choose “Yes” if prompted by UAC.
6. Once the script runs, restart your computer.
After restarting your PC/Laptop, the Activate Windows watermark will be gone.
5. Remove Activate Windows Watermark via Ease of Access
You can also remove the Activate Windows watermark using Ease of Access option, which is built in Windows. Before you go haywire, here’s how to do that.
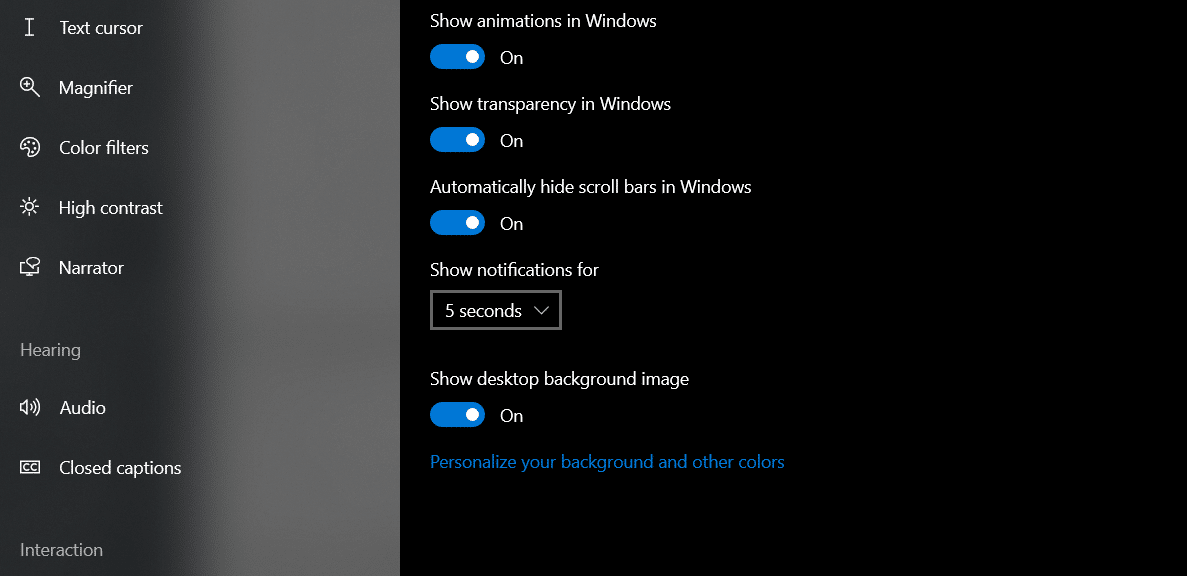
1. Click Start and search for Ease of Access Display Settings.
2. Scroll down and toggle off “Show desktop background image” option.
3. Restart your PC/Laptop.
Once restarted, your background should be gone along with the Activate Windows watermark as well.
6. Remove Activate Windows Watermark using a BAT (Batch) File
There’s another notepad tweak that will let you remove the Activate Windows watermark, and that is done by creating a Batch (.BAT) file.
1. Click Start and type in Notepad and hit Enter.
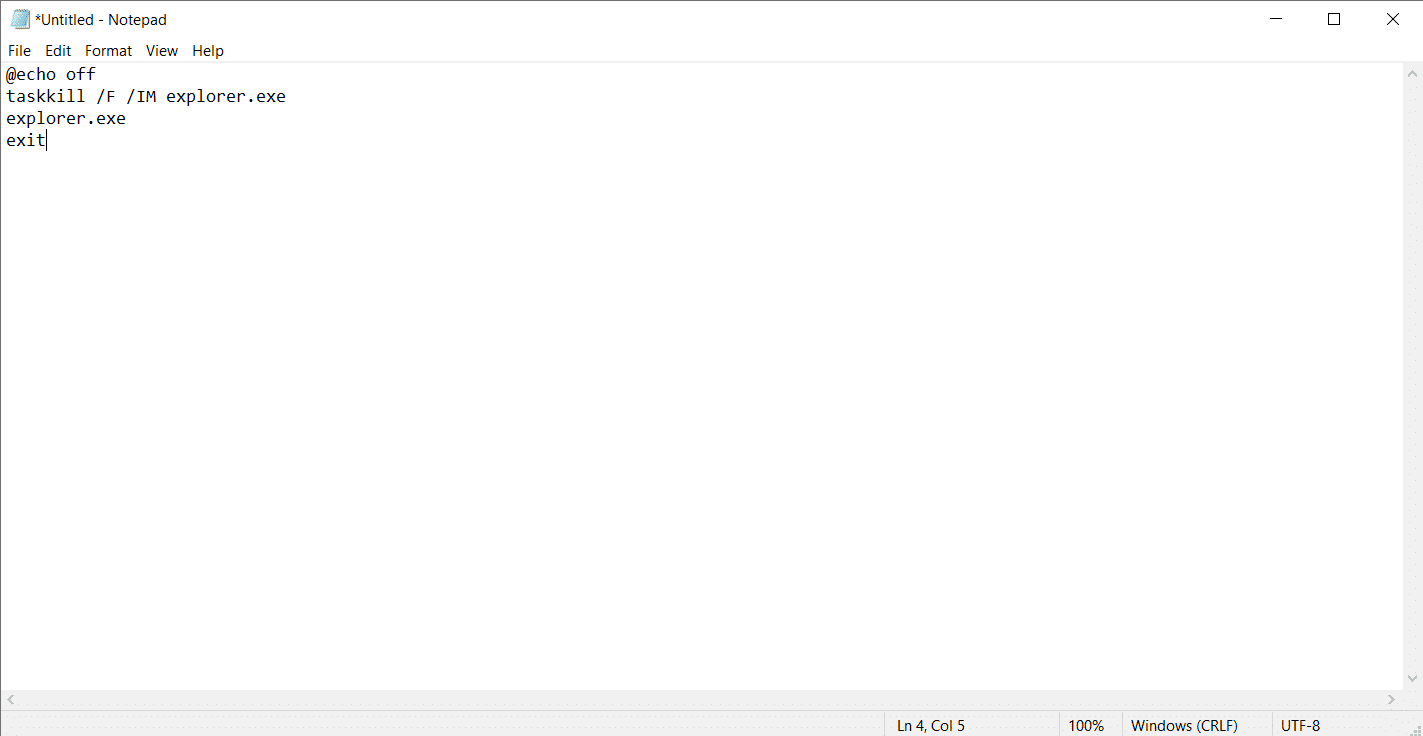
2. Once opened, copy and paste the below command in the Notepad.
@echo off
taskkill /F /IM explorer.exe
explorer.exe
exit
3. After pasting this text, go to File > Save As and give the file name as remove.bat only. Choose “All files” from the Save as type dropdown menu.
4. Save the file on Desktop for easier access, and click Save.
5. Now close the notepad, and go to the Desktop. Right-click on the “remove.bat” file and select “Run as administrator.” Choose “Yes” if prompted by UAC.
6. Once the command window opens up and closes off, restart your computer.
After restarting your PC/Laptop, the Activate Windows watermark will be hidden now.
7. Get rid of Activate Windows Watermark by Disabling WIndows 10 Tips
An easy way to disable the Activate Windows watermark permanently, is through disabling Windows 10 Tips. To disable them, follow the process below.
1. Go to Start and click on the Settings (⚙) icon.
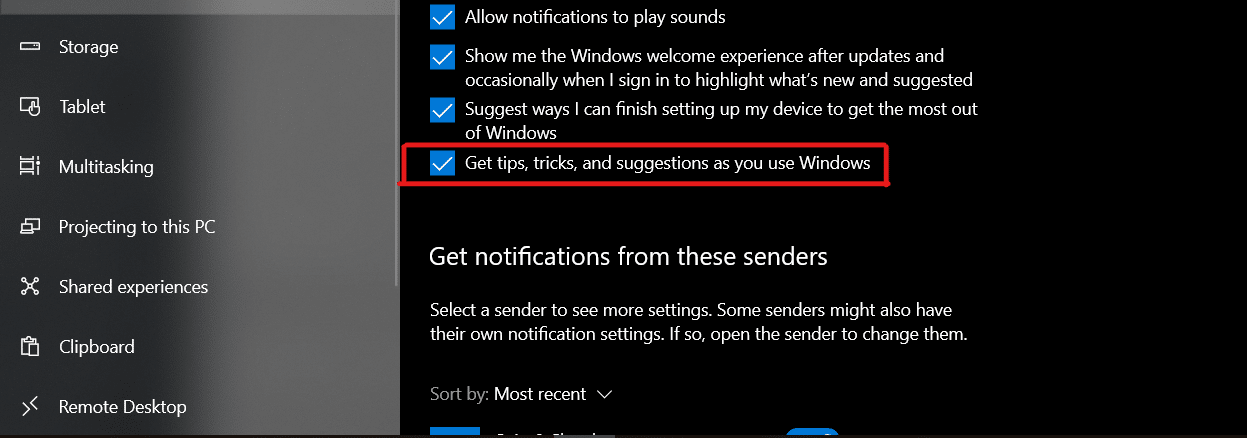
2. Click on Settings, and then click on Notifications & actions from the left pane.
3. Now scroll down and find the option that says “Get tips, tricks, and suggestions as you use Windows” and toggle it OFF.
4. Once done, restart your PC/Laptop.
This shall get rid of the Activate Windows Watermark.
8. Hide Activate Windows Watermark using a Free Third-Party Tool
If none of the above tips worked, your last resort should be a third-party tool to remove the “Activate Windows” watermark. There are many tools available out there. These tools trick Windows to think it’s activated. We don’t recommend using this method, but this should be your last option if nothing works.
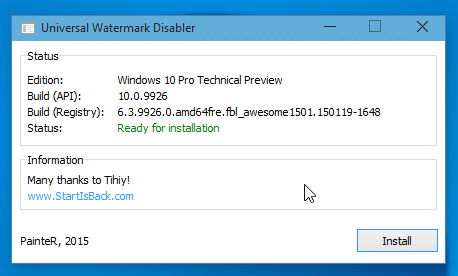
1. Download the Universal Watermark Disabler tool using the download link given below.
2. Unzip the file and make sure that all the applications are closed.
3. Double click on uwd.exe file. Click “yes” if prmopted by UAC. A window will popup on your screen.
4. Click on the “Install” button.
If necessary, restart your machine and you will be good to go. The Activate Windows watermark should be gone by now.
Conclusion
These were the 8 ways to remove and hide the Activate Windows watermark. Although, we recommend you to use a Product Key to activate Windows to activate your Windows 10 machine. Concluding this article, we hope we solved your problem when it comes to getting red of the activate windows watermark permanently.
If you have any further queries, let us know in the comments below. We will try our best to resolve them as soon as possible.
For the latest tech news and reviews, follow Tech Baked on Twitter, Facebook, Instagram, and join our Telegram Channel for daily tech news in your inbox.
The 8 (uwd) works for me! Thanks