Keeping your CPU Temperature low goes a long way in making sure your computer remains fast for a long time. Frequent heating of the CPU due to intensive tasks such as gaming, high-resolution video editing may cause throttling, random shutdowns, and impact CPU clock speeds.
Overheating your CPU may also cause frequent BSODs (Blue Screen of Death) and generally make your PC feel sluggish. To keep your CPU temperature cool, you must know its rising temperatures and during which tasks. So, today we have gathered the best ways to check your CPU temperature on Windows.
What is the Best and Idle Temperature for your CPU?

Since most CPUs are different, the best CPU Temperature for your particular model will also be different. To check the maximum temperature for your processor, you can search its product page on the internet (Make sure to search for the specific CPU model that you have). The product page will list the max temperature you should let your CPU go to. For example:
In the above image, you can see that the T Junctions is 100°C. For most tasks, you should try to keep your CPU Temperature about 30°C less than the T Junction; in this case, it means that I should keep my CPU Temperature under 70°C most of the time. If on the product page the temperature is mentioned under something like “Maximum Operating Temperature” or “T Case,” you should try to keep your CPU Temperature under the given Temperature.
If your computer is Idle, then the best Idle temperature for your CPU should be less than or near 45°C. Idle temperatures for CPUs also vary, so you shouldn’t be very concerned if your idle CPU Temperature is a bit higher than 45°C.
What’s a Bad Temperature for Your CPU?
A bad temperature for your CPU is anything that puts a lot of stress on your CPU and causes it to throttle. While intensive tasks such as gaming, video editing, or rendering may push your CPU Temperature to 80-90°C, you shouldn’t worry about it too much unless it hits the mid-90s.
Anything above 93°C can be called a bad temperature for your CPU. Keeping your CPU at that temperature for a high amount of time may cause it to throttle or may cause your system to shut down. Very high CPU Temperatures can also permanently dame your CPU or drastically reduce the life of your PC.
How to Check CPU Temperature on Windows?
1. Using ThrottleStop
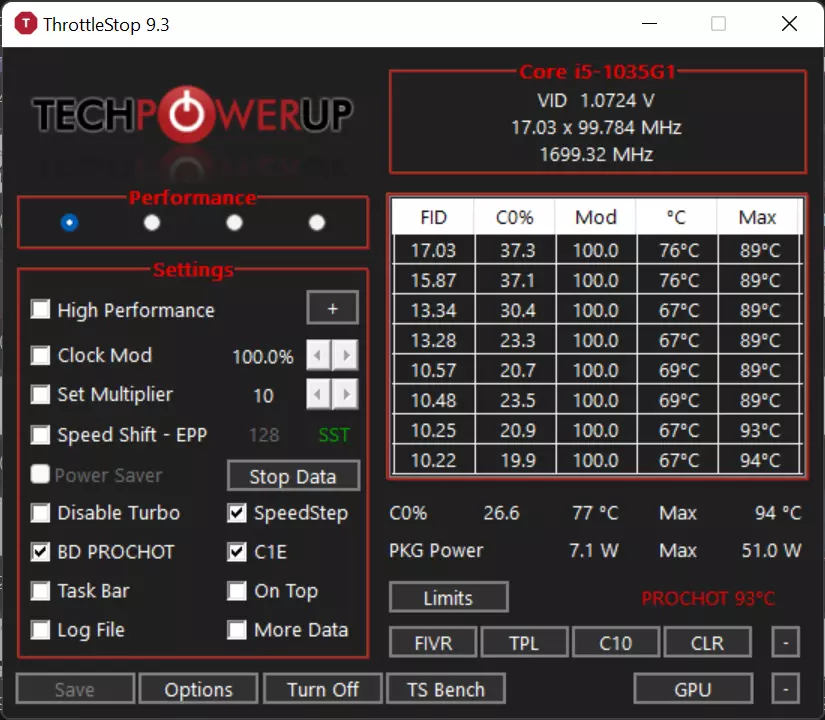
ThrottleStop is a popular app designed to monitor and fix all types of CPU throttling (Thermal, Power Limit, and Processor Power Module). Follow the steps below to launch ThrottleStop automatically on startup and have it display your CPU Temperature on the taskbar, follow the steps below:
- Download ThrottleStop.
- Launch Settings and under “Apps” click on “Startup”.
- Find ThrottleStop and enable it to launch on Startup.
If ThrottleStop isn’t visible in settings:
- Right click the Start Menu and click on “Task Manager”.
- Click on “Startup”.
- Find ThrottleStop and enable it to launch on Startup.
To display CPU Temperature in your Taskbar, follow the given steps:
- Locate and launch ThrottleStop.
- Click on “Options” at the bottom.

- Under “Notification Area”, check the box for “CPU Temp”.

You should now be able to see your CPU Temperature directly from your taskbar.
2. Using HWMonitor
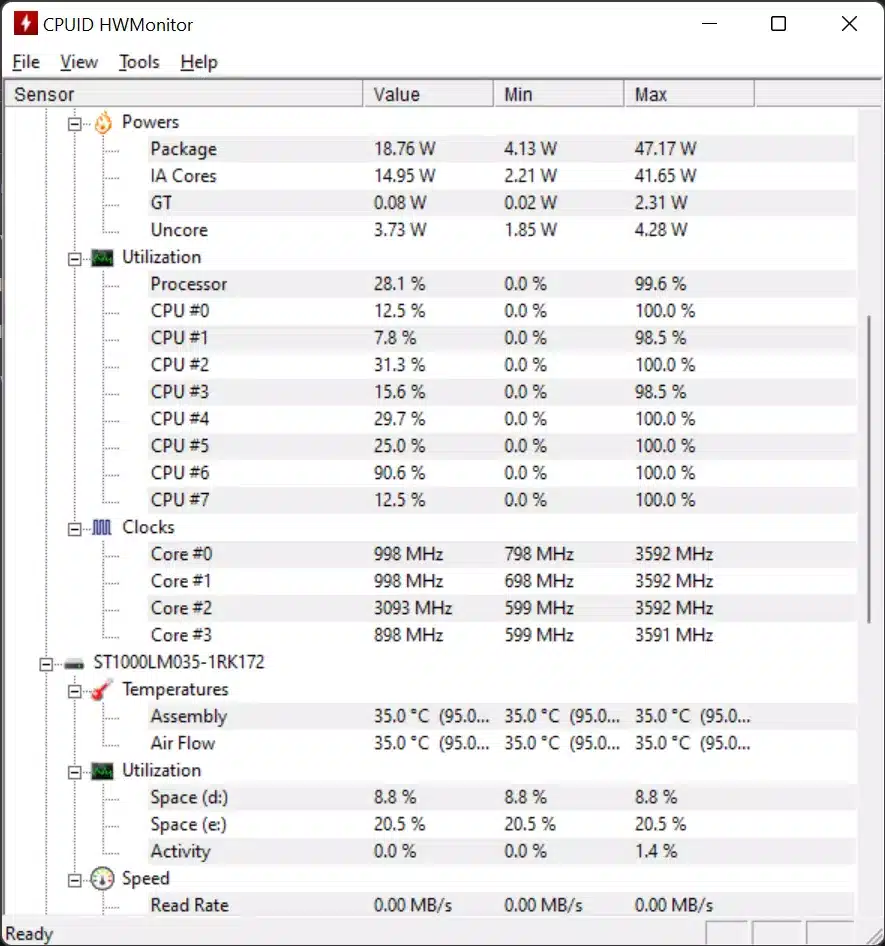
HWMonitor is a great app to check your CPU Temperatures and voltages, and you can also use it to check fan speeds and more. To use HWMonitor to check your CPU temperature, follow the steps below:
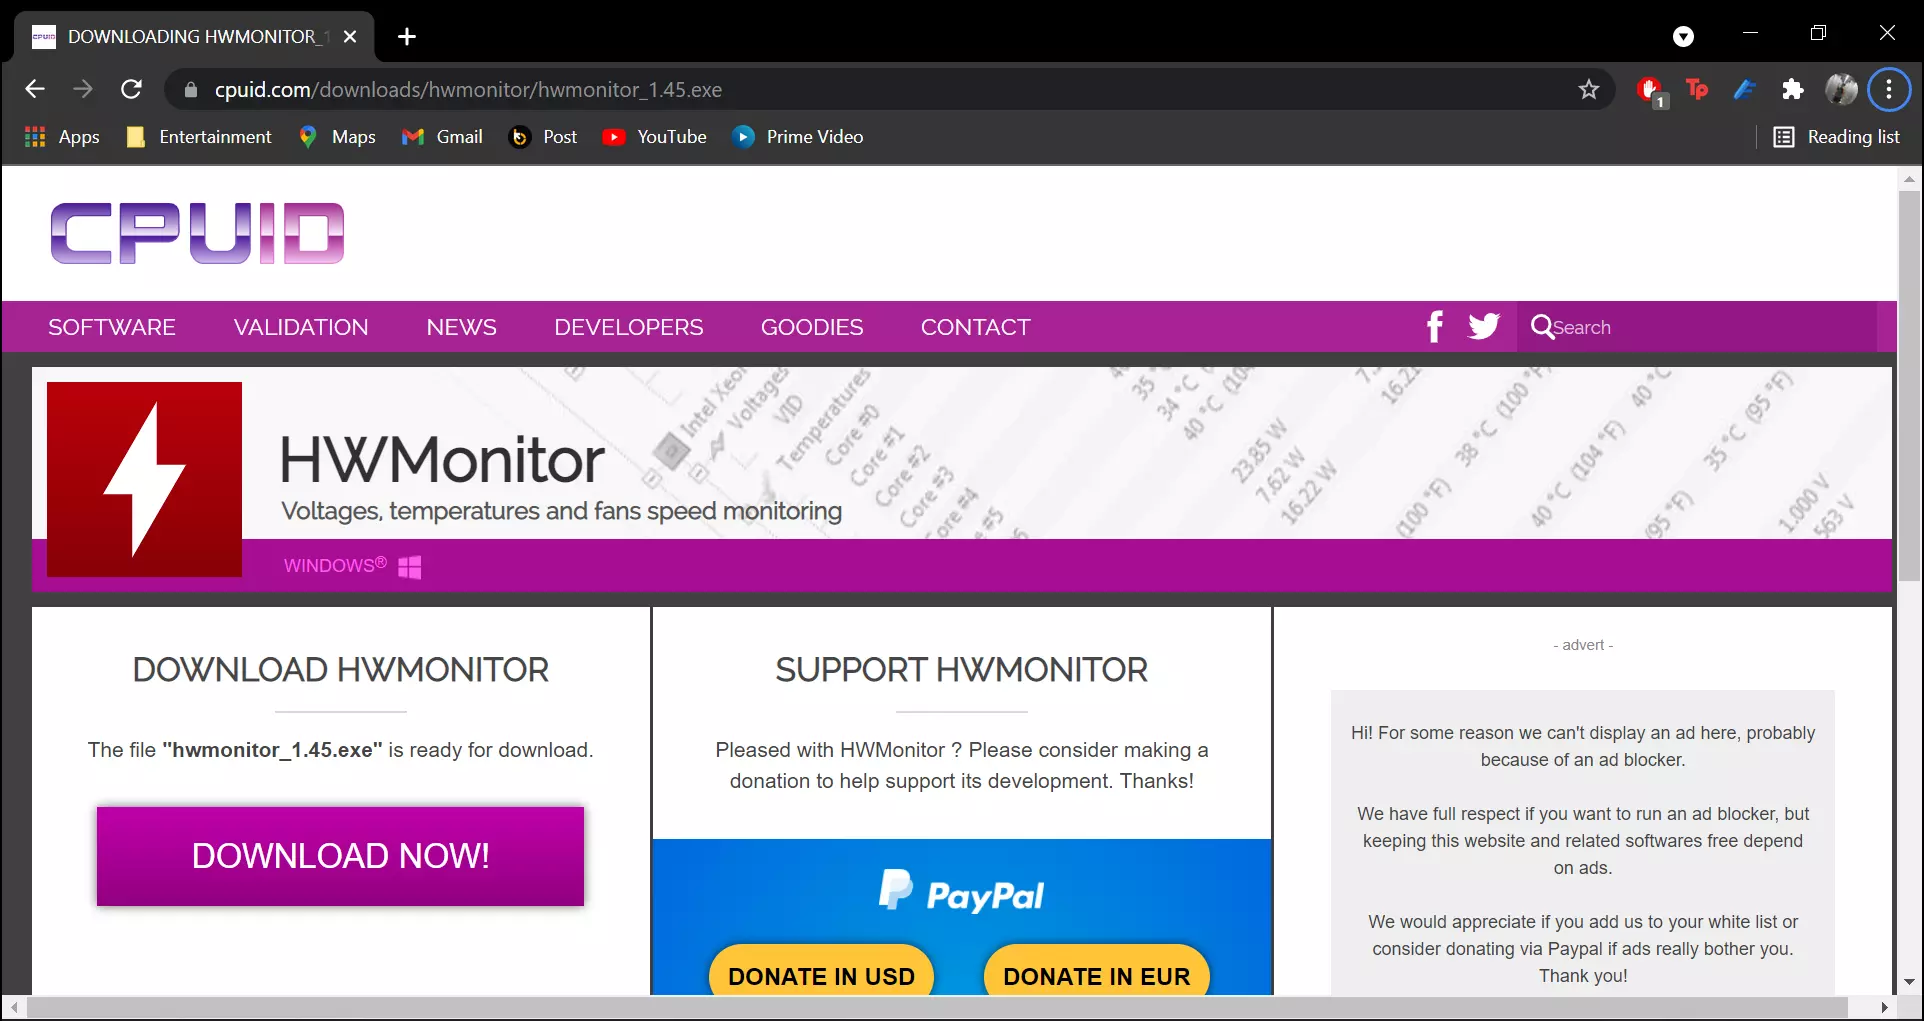
- Download HWMonitor on your PC using the given link.
- Locate and launch HWMonitor.

- You can now see the minimum, current, and maximum temperature for each of your CPU Core.
- You can also scroll down for statistics about other hardware components of your system.
Other Software’s to Check Your CPU Temperature on Windows
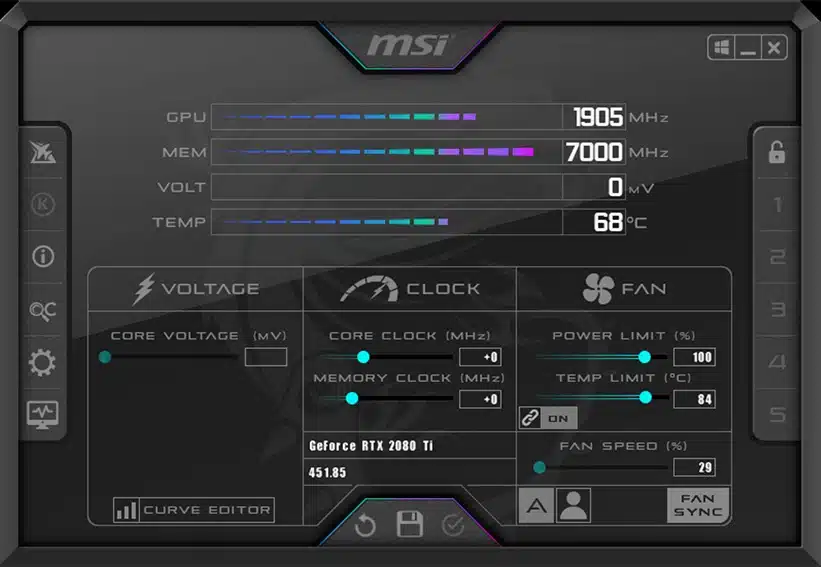
1. MSI Afterburner
MSI originally designed this for gamers who want to overclock their CPUs to boost performance, MSI Afterburner is also a great app to monitor your CPU Temperatures. MSI Afterburner plots data like CPU Temperature, GPU Temperature, framerate, and more on a graph so you can easily observe them.
If you want to prioritize the temperature of your CPU, then you can reorder the graphs to show CPU Temperature at the top. To do that, follow the steps below:
- Download MSI Afterburner from the official website.
- Locate and launch MSI Afterburner.

- Click on Settings to the left.
- Now, click on “Monitoring” from the given tabs.

- Drag and place the different CPU cores at the top.

You can also see the temperature of your CPU on the screen using a simple shortcut. To do this, follow the steps below:
- Locate and launch MSI Afterburner.
- Click on the setting icon to the left.
- Now, click on “Monitoring” from the given tabs.
- Click on what you want to see on screen, then click on “Show in on-screen display”.
- Now move over to the “On screen display” tab.
- Here you can set different shortcuts to view your temperature on-screen.
2. Open Hardware Monitor
Open Hardware Monitor is a great, free app if you’d like to see statistics such as CPU Clock Speed, temperature, load, and more in one place. You can also use Open Hardware Monitor to view the temperature of your SSD if you have one. You can also see the load on your Memory. Open Hardware Monitor can also display all these statistics on your taskbar. To do this, follow the steps below:
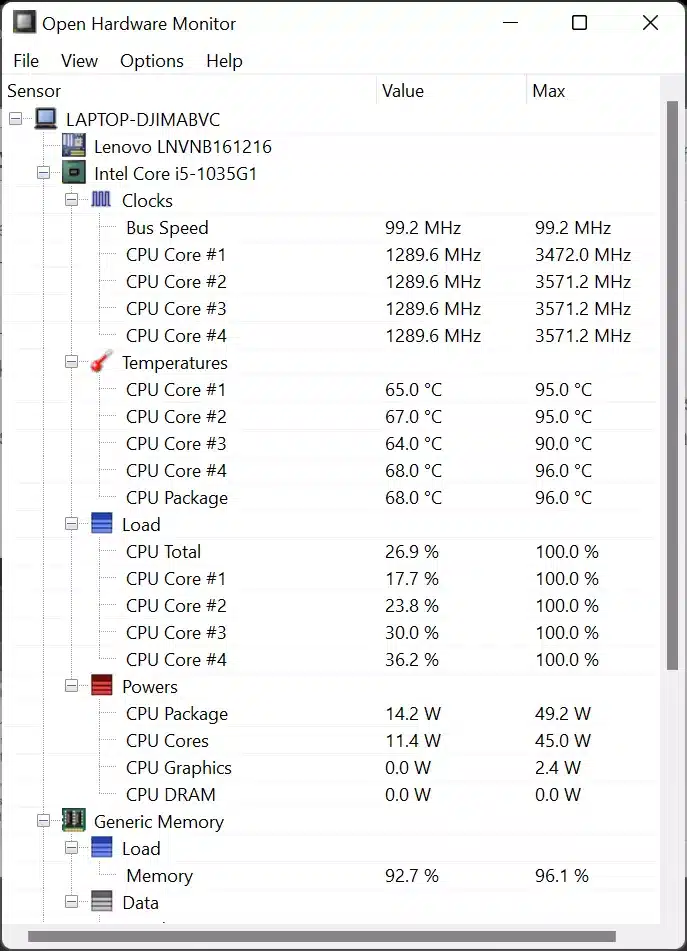
- Download and install Open Hardware Monitor.

- Extract the downloaded zipped folder.
- Locate and launch Open Hardware Monitor.
- Now, right click on the statistics you want to see on your Taskbar.
- Click on the show in tray option.
- Change the color of the temperature shown by right clicking it and clicking on “Change Colour” to make it more “visible.700”.
3. Speccy
Like other apps on this list, Speccy is another excellent all-in-one app to view different statistics of your PC. Speccy not only shows your CPU-related statistics but also statistics on Storage, Memory, Peripherals, Motherboard, and more. To pin your CPU Temperature to the taskbar using Speccy, follow the steps below:
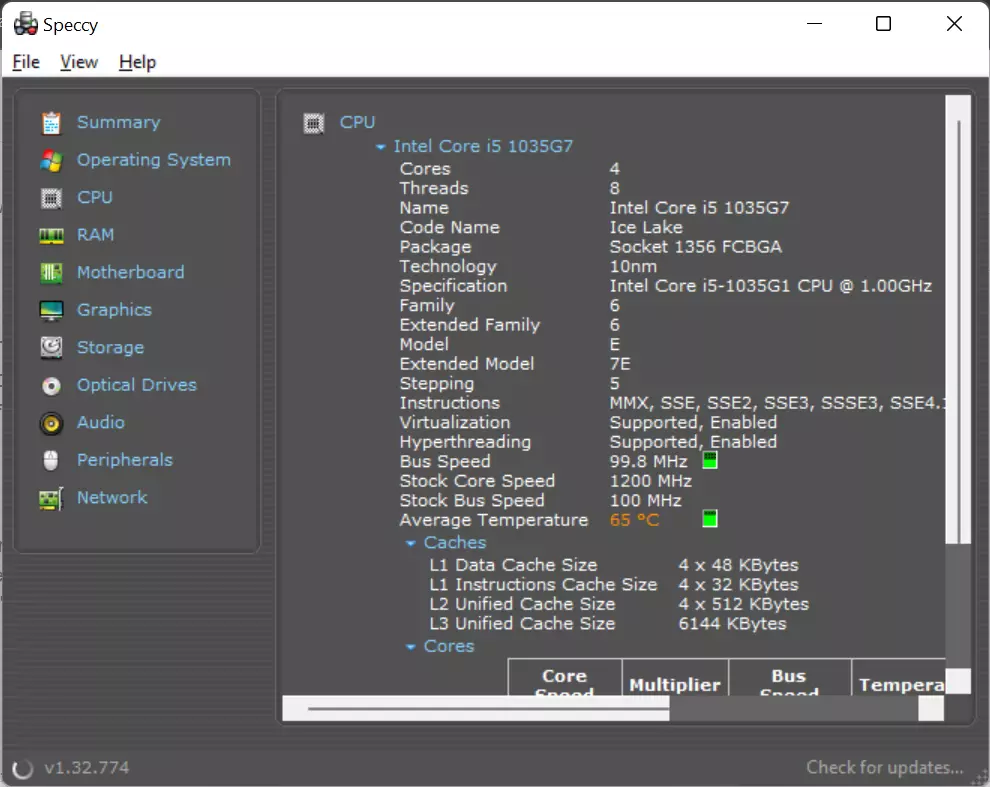
- Download and install Speccy.
- Run the setup wizard and open Speccy.
- Click on the “View” tab and click on “Options”.
- Now, click on “System Tray” and check the “Minimise to tray”, “Display metrics in tray,” and “Run Speccy in tray when computer starts” options.
- From the drop-down menu next to “Output”, select CPU.
4. Core Temperature
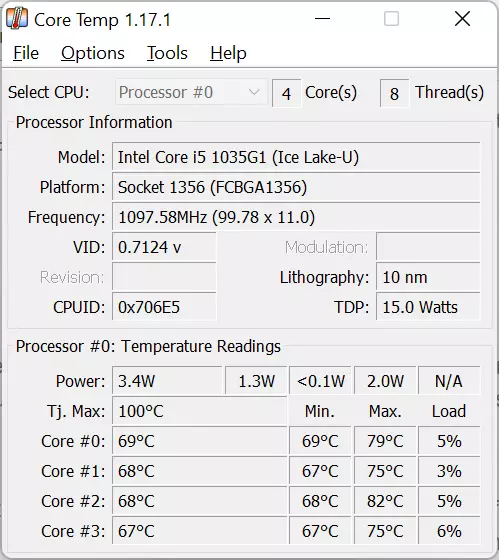
Core Temperature does exactly what its name suggests; it shows you the temperature of the different cores of your CPU. Core Temperature is solely focused on the statistics of your CPU. So, if you are looking for an app that displays statistics only about your CPU, then Core Temperature is the way to go.
After going through the setup wizard, Core Temperature will automatically show temperatures of different cores of your CPU in the taskbar, so you don’t have to go through any additional steps. Core Temperature also shows various statistics such as Power, T Junction of your CPU, load, and more. Core Temp is a great app to view your CPU Temperature and other CPU-related statistics.
How to Lower Your CPU Temperatures?
Using the above methods, if you find your CPU too hot, here are some methods to cool your CPU down.
1. Don’t block Vents
Vents in a laptop are helpful to release hot air to cool your CPU down properly. Ensure not to block the vents on your laptop, especially if you’re doing high-intensity tasks such as gaming or video editing. Some tips on how to not block Vents are:
- Make sure your laptop is at an angle to the surface to not block the bottom Vent.
- If you’re laptop has side vents, make sure not to place thick objects such as book next to the laptop.
2. Don’t Overclock
Overclocking increases your CPU clock speed using the BIOS settings. Overclocking is not recommended if you have a subpar cooling system on your desktop. If you’ve overclocked your CPU, it may be causing your CPU to overheat. Revert your CPU setting to normal, and it should stop overheating.
3. Don’t run high-intensity tasks for long times
If you have a budget or an old CPU on your laptop or desktop, running high-intensity tasks might increase the CPU Temperature to exceedingly high values. Generally, avoid high-intensity tasks such as gaming or rendering if you’re not sure your CPU can handle it.
4. Check for Malware
Malware such as Viruses, Trojans, and worms may cause your CPU to work harder in the background. If you’re idle or aren’t doing CPU-intensive tasks and your CPU Temperature is really high, your system may have been infected with malware.
Try running anti-virus programs such as McAfee, Kaspersky, Windows Defender to check for malware on your system.
Checking Temperature of CPU is Easy on Windows
Those were the various methods to check your CPU temperature on Windows 10. Cooling your CPU is very important so that your system doesn’t shut down randomly and has a long life. You can choose any of the above software to check your CPU Temperature; they all do an outstanding job.
Read More like this:
- Apps Not Working on Android? Here are the 9 Best Fixes You Should Try!
- How to Fix “System Thread Exception Not Handled” Error Stop Code on Windows 10
- How to Split Screen on Mac: Use 2 Windows Side by Side Effortless
- How to Uninstall Apps on macOS (2 Easy Ways)
- How to Stream Netflix on Discord Easily (2021)